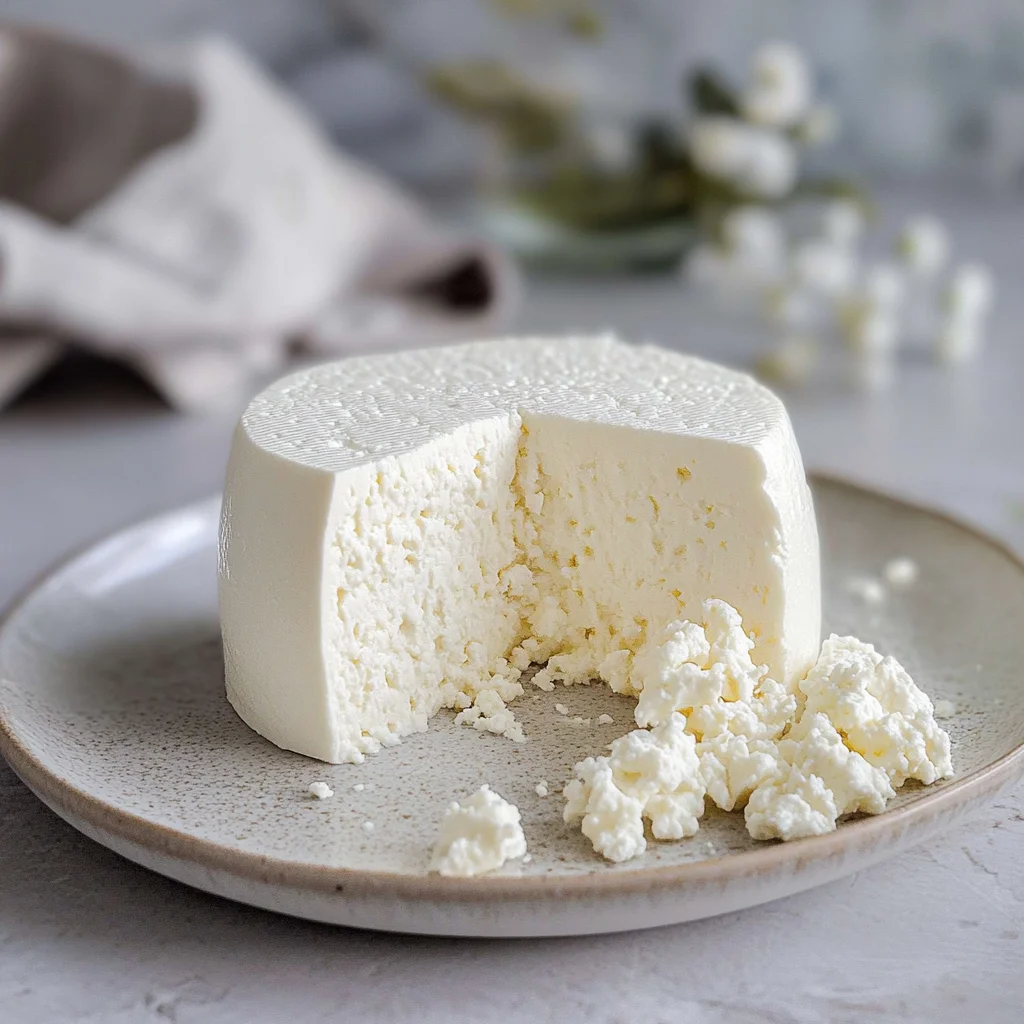
Imagine the first bite of a queso fresco recipe, where the creamy texture melts against your tongue, releasing a burst of fresh, milky goodness that dances with the vibrant flavors of zesty herbs and spices. This light, crumbly cheese is like a culinary confetti that elevates tacos, enchiladas, or even a simple salad into something extraordinary, making every meal feel like a celebration.
I still remember the first time I tasted this delightful cheese at my abuela’s kitchen during family gatherings. The aroma of homemade tortillas filled the air as we piled our plates high with fresh ingredients, and that queso fresco was the star of the show. Whether it’s summer barbecues or cozy winter dinners, this versatile cheese brings people together, promising an unforgettable flavor experience that will have you craving more.
Why Is queso fresco recipe So Irresistibly Good?
Freshness shines through in this easy-to-make cheese, using just three simple ingredients. Creamy whole milk creates a rich texture, while tangy white vinegar adds the perfect zing. With only 30 minutes of prep and no cooking required, it’s a quick way to elevate your dishes. Versatile and crowd-pleasing, queso fresco is ideal for topping tacos, salads, or enjoying on its own!
queso fresco recipe Ingredients
- For the Cheese
- 1 gallon whole milk (preferably raw or pasteurized, not ultra-pasteurized) – This is the base for your queso fresco recipe, creating a rich and creamy texture.
- For the Coagulation
- 1 cup white vinegar (or lemon juice) – This ingredient helps to curdle the milk, forming the fresh cheese.
- For the Flavor
- 1 teaspoon salt (to taste) – Adjust to your preference, enhancing the cheese’s natural flavor for your culinary creations.
How to Make queso fresco recipe

1. Heat the milk in a large pot over medium heat until it reaches 190°F (88°C). Stir occasionally to prevent scorching, and watch as it gently begins to steam for that perfect creamy texture.
2. Add the vinegar or lemon juice slowly to the heated milk, stirring gently until curds form. You’ll notice the transformation as the curds begin to separate from the whey—it’s like magic!
3. Let the mixture sit for about 10 minutes. This resting time allows the curds to fully separate from the whey, ensuring a light and crumbly cheese.
4. Line a strainer with cheesecloth and place it over a bowl. Pour the curds and whey into the strainer to drain, watching as the clear whey separates beautifully from your fresh curds.
5. Gather the cheesecloth around the curds and rinse them under cold water. This step removes any residual vinegar or lemon juice, giving you a clean-tasting queso fresco.
6. Sprinkle salt over the curds and mix gently. Shape them into a ball or patty, wrapping them snugly in cheesecloth for that perfect rustic look.
7. Place a weight on top of the wrapped cheese to help it firm up for about 1 hour. This helps develop its crumbly texture while it cools down.
8. Unwrap your fresh queso fresco and enjoy right away, or refrigerate for later use—it’s delightful on its own or sprinkled over your favorite dishes!
Optional: Serve with fresh herbs for an extra burst of flavor!
Exact quantities are listed in the recipe card below.
Tips for the Best queso fresco recipe
- Milk Quality Matters: Use whole milk that is either raw or pasteurized. Ultra-pasteurized milk won’t curdle properly, affecting texture.
- Temperature Control: Heat the milk to exactly 190°F (88°C). Going over can scorch it, while under can prevent curds from forming.
- Gentle Stirring: When adding vinegar or lemon juice, stir gently. Too vigorous stirring can break up the curds, resulting in a grainy texture.
- Draining Technique: Ensure you let the curds drain properly. If left too wet, your cheese will be soggy instead of crumbly.
- Salting Wisely: Adjust salt to your taste, but remember to sprinkle it evenly and mix gently to avoid overly salty pockets in your queso fresco recipe.
- Pressing for Texture: Use a weight that’s not too heavy when pressing the cheese. This helps achieve a perfect crumbly consistency without making it too dense.
How to Store and Freeze queso fresco recipe
- Fridge: Keep your queso fresco recipe tightly wrapped in plastic wrap or stored in an airtight container for up to 5 days to maintain its freshness.
- Freezer: For longer storage, freeze the cheese in an airtight container or freezer bag for up to 3 months. Thaw it in the fridge before use.
- Room Temperature: Avoid leaving queso fresco recipe at room temperature for more than 2 hours to prevent spoilage and ensure safety.
- Reheating: If your cheese becomes too firm after freezing, gently warm it in a microwave at low power for short intervals until softened.
queso fresco recipe Variations
Feel free to get creative and customize this delightful cheese to suit your taste and dietary needs!
- Dairy-Free: Use a blend of almond milk or coconut milk with lemon juice for a plant-based version. This alternative still delivers a satisfying crumbly texture while being gentle on the stomach.
- Herbed Delight: Add fresh herbs like cilantro or chives to the curds before pressing for an aromatic twist. The vibrant flavors will elevate your dishes and bring a burst of freshness in every bite.
- Zesty Citrus: Incorporate lime juice instead of vinegar for a bright, tangy flavor. This variation not only enhances the taste but also pairs beautifully with Mexican-inspired dishes.
- Smoky Infusion: Mix in smoked paprika or chipotle powder for a rich, smoky profile. Just a teaspoon will add depth, making it perfect for topping tacos or salads.
- Creamy Texture: Combine half-and-half with your whole milk for a creamier queso fresco. This twist provides a luscious mouthfeel that complements various culinary creations.
- Heat Boost: Stir in finely chopped jalapeños or serrano peppers for added heat. Adjust the amount to your liking, and enjoy the spicy kick!
- Nutty Flavor: Blend in finely ground nuts such as cashews or almonds. This unique addition introduces an earthy flavor that pairs well with both sweet and savory dishes.
- Sweet Touch: Add a dash of honey or agave syrup to balance out the saltiness if you desire a hint of sweetness. It creates an unexpected yet delightful flavor profile that works wonderfully in desserts.
Make Ahead Options

Preparing this queso fresco recipe ahead of time is a fantastic way to streamline your meal prep while ensuring you have fresh cheese on hand for various dishes. You can easily gather the main ingredients—1 gallon of whole milk, 1 cup of white vinegar (or lemon juice), and 1 teaspoon of salt—up to 24 hours in advance. Additionally, you can complete the initial steps of heating the milk and forming the curds, which allows you to store them in the refrigerator for up to 3 days before finishing the cheese. Just remember to keep it in an airtight container to maintain its freshness. When you’re ready to serve, simply sprinkle salt over the curds, shape them into a ball or patty, and let them firm up as directed in the recipe. This make-ahead approach not only saves you time but ensures that your queso fresco is always ready to elevate any meal!
queso fresco recipe Questions Answered
What type of milk should I use for this queso fresco recipe?
Using whole milk is key to achieving the creamy texture of queso fresco. Ideally, choose raw or pasteurized milk, but avoid ultra-pasteurized as it can hinder curd formation. If you can’t find raw or pasteurized, regular whole milk from the store will still work well!
Can I substitute white vinegar with something else?
Absolutely! While white vinegar is a traditional choice, you can also use lemon juice for a slightly different flavor profile. Both options will effectively help curdle the milk at the right temperature of 190°F (88°C).
How long can I store homemade queso fresco?
Once you’ve made your cheese, it can be stored in an airtight container in the refrigerator for up to a week. To keep it fresh longer, consider wrapping it tightly in plastic wrap or cheesecloth before placing it in the container.
Is it possible to freeze queso fresco?
Yes, you can freeze queso fresco! Just make sure to wrap it securely in plastic wrap and store it in a freezer-safe bag. It should maintain good quality for about 2-3 months. When ready to use, simply thaw it slowly in the refrigerator.
What if my curds don’t form properly?
If your curds aren’t forming after adding vinegar or lemon juice, double-check that the milk reached at least 190°F (88°C). If it’s too cool, the process won’t work as effectively. You might also need to let it sit a little longer—up to 15 minutes—to encourage separation.
How many servings does this recipe yield?
This queso fresco recipe makes about four generous servings, with each serving containing approximately 80 calories. It’s perfect for topping dishes like tacos or salads or even enjoying on its own with some fresh bread!
Queso Fresco
Ingredients
Method
- In a large pot, heat the milk over medium heat until it reaches 190°F (88°C), stirring occasionally to prevent scorching.
- Once the milk is heated, remove it from the heat and slowly add the vinegar or lemon juice, stirring gently until curds form.
- Let the mixture sit for about 10 minutes to allow the curds to fully separate from the whey.
- Line a strainer with cheesecloth and place it over a bowl. Pour the curds and whey into the strainer to drain the whey.
- Gather the cheesecloth and rinse the curds under cold water to remove any residual vinegar or lemon juice.
- Sprinkle salt over the curds and mix gently. Shape the curds into a ball or patty and wrap in cheesecloth.
- Place a weight on top to help it firm up for about 1 hour.
- Unwrap the cheese and enjoy fresh, or refrigerate for later use.