Picture this: the warm, golden aroma of freshly made mini tortillas wafting through the air, inviting you to take a bite of their soft, pillowy goodness. These little culinary treasures are not just a side; they’re an experience, bursting with flavor and perfect for any occasion, from taco night to impromptu gatherings with friends.
As a child, I remember my grandmother crafting mini tortillas while laughter filled the kitchen; each one rolled out like a tiny canvas ready to hold delicious fillings. Whether paired with zesty salsa or wrapped around savory meats, these mini tortillas promise an explosion of taste that will have you coming back for seconds—if not thirds!
Why are MINI TORTILLAS a game changer?
Versatile: Mini tortillas can be used for endless dishes, from tacos to wraps!
Quick and easy: Prepare them in just minutes, perfect for busy weeknights.
Flavor-packed: Each bite bursts with fresh ingredients and authentic taste.
Crowd-pleaser: Great for parties; everyone loves their bite-sized charm!
Fun to customize: Let your creativity shine with toppings and fillings.
Mini Tortillas Ingredients
For the Dough:
- 2 cups all-purpose flour – Provides the perfect base for soft and pliable tortillas; whole wheat flour can be used for a healthier option.
- 1/2 teaspoon salt – Enhances flavor; feel free to use sea salt or Himalayan salt as substitutes.
- 1/4 cup vegetable oil – Keeps the tortillas tender; olive oil works beautifully if you prefer a richer taste.
- 3/4 cup warm water – Helps in forming a smooth dough; adjust slightly if the dough feels too dry.
For Cooking:
- Extra flour for dusting – Prevents sticking while rolling out your mini tortillas; use cornmeal for a unique flavor twist.
- Non-stick skillet (medium heat) – Ideal for cooking; you can also use cast iron for that authentic char.
Enjoy crafting these delightful mini tortillas, perfect for tacos, wraps, or as a fun snack!
How to Make MINI TORTILLAS
1. Gather ingredients. Start by assembling your flour or corn masa, water, and a pinch of salt. Fresh ingredients make all the difference in taste and texture!
2. Mix dough. In a large bowl, combine the masa with water and salt, stirring until a soft, pliable dough forms—about 3 to 5 minutes of mixing should do the trick.
3. Divide dough. Pinch off small portions of the dough and roll them into balls, roughly the size of golf balls. This will help you create evenly sized MINI TORTILLAS.
4. Flatten balls. Using a tortilla press or rolling pin, flatten each ball into a thin circle—aim for about ¼ inch thick. The thinner they are, the better they’ll cook!
5. Heat skillet. Preheat a dry skillet over medium-high heat until hot—this typically takes about 2 minutes. A hot skillet ensures those lovely golden spots develop on your tortillas.
6. Cook tortillas. Place each flattened tortilla onto the skillet and cook for about 30 seconds on one side until bubbles form, then flip and cook for another 30 seconds until lightly browned.
7. Keep warm. As you cook each tortilla, stack them on a plate and cover with a clean kitchen towel to keep them warm and soft while you finish cooking the rest.
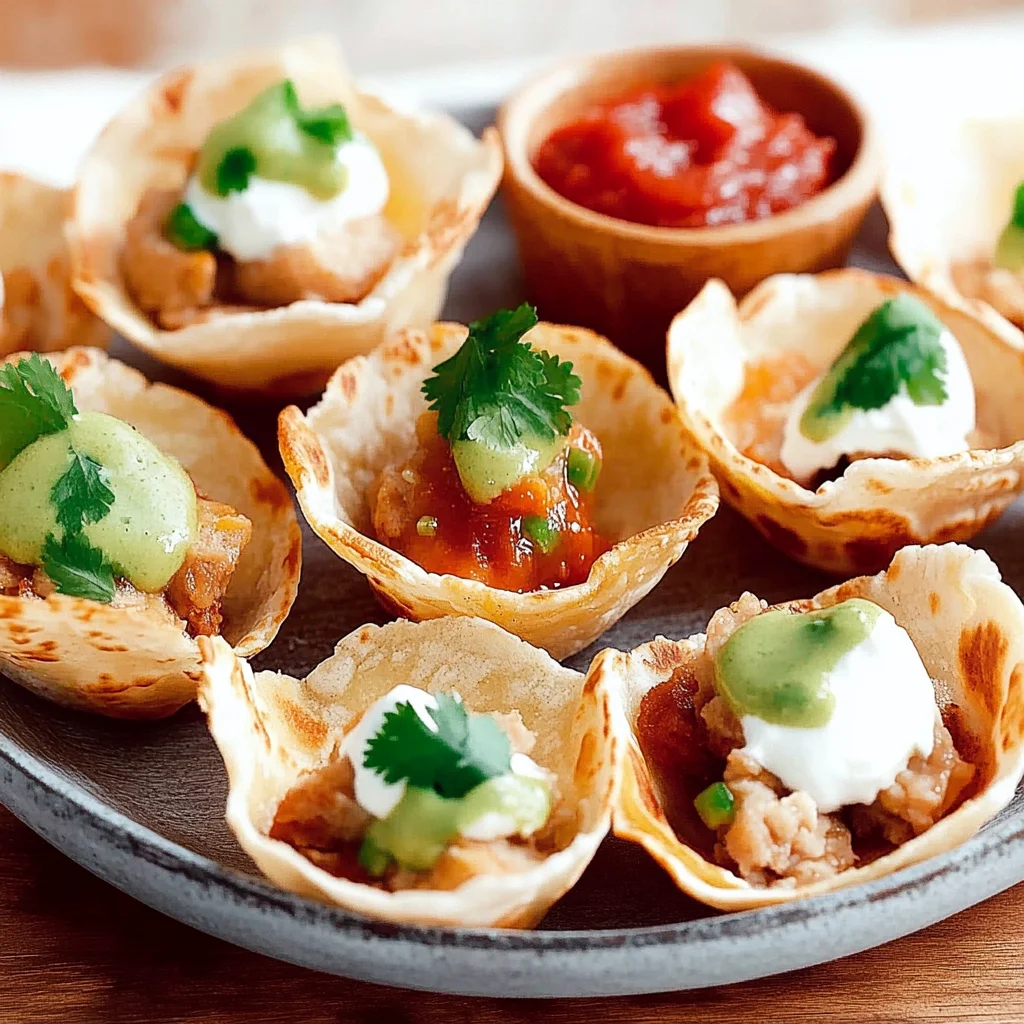
Optional: Serve with fresh salsa or guacamole for a delightful touch!
Exact quantities are listed in the recipe card below.
Tips for the Best MINI TORTILLAS
- Use Fresh Ingredients: Always opt for fresh masa or flour; it elevates the flavor and texture of your mini tortillas significantly.
- Avoid Overworking Dough: Mix just until combined. Over-kneading can lead to tough tortillas instead of soft, pliable delights.
- Perfect Heat Control: Cook on medium-high heat for a quick, even char. Too hot will burn them, while too cool won’t cook through.
- Keep Them Warm: Stack cooked mini tortillas in a clean cloth to keep them warm and soft while you finish cooking the rest.
- Don’t Skip Resting Time: Let the dough rest for at least 30 minutes. This relaxes the gluten and makes rolling easier!
- Storage Tips: If you have leftovers, store them in an airtight container or freeze them for future delicious meals.
How to Store and Freeze MINI TORTILLAS

- Room Temperature: Keep your mini tortillas wrapped in a clean kitchen towel for up to 2 days. This helps maintain their softness and prevents them from drying out.
- Fridge: Store mini tortillas in an airtight container or a resealable plastic bag for up to 1 week. This will keep them fresh and ready for your favorite dishes.
- Freezer: For longer storage, stack mini tortillas with parchment paper in between, then wrap tightly in plastic wrap or foil. They can last up to 3 months in the freezer.
- Reheating: To enjoy your mini tortillas, reheat them in a dry skillet over medium heat for about 30 seconds on each side. They’ll be warm and pliable, ready for filling!
MINI TORTILLAS: Fun Twists Await!
Feel free to let your creativity shine as you customize these delightful bites to suit your taste buds!
- Gluten-Free: Swap regular flour with almond or coconut flour for a gluten-free delight. The texture may be slightly different, but the flavors remain fantastic.
- Spicy Kick: Add diced jalapeños or a pinch of cayenne pepper to the dough. This spicy twist will awaken your senses and add an exciting zing.
- Herbed Bliss: Mix in fresh herbs like cilantro or chives for a fragrant boost. These mini tortillas will transform into aromatic pockets of joy!
- Sweet Surprise: Incorporate a touch of cinnamon and sugar for a sweet version. These can be perfect for dessert or breakfast, filled with fruit.
- Veggie-Packed: Fold in finely chopped spinach or grated zucchini into the dough. This not only adds color but also sneaks in some healthy greens.
- Cheesy Goodness: Mix shredded cheese directly into the dough for a savory twist. The melty goodness will have everyone reaching for seconds!
- Nutty Flavor: Use nut butter instead of oil for a deliciously rich taste. This adds an unexpected depth that pairs beautifully with sweet or savory fillings.
- Crispy Texture: Bake the tortillas until crispy for a crunchy snack option. Serve them with dips, and watch them disappear at your next gathering!
Make Ahead Options
When it comes to meal prep, mini tortillas are a game changer that can save you time during busy weekdays. You can easily prepare the dough for these delightful mini tortillas up to 24 hours in advance; simply mix the ingredients, roll them into balls, and store them in an airtight container in the fridge. If you want to take it a step further, you can make the tortillas themselves and keep them in the fridge for up to three days. Just ensure they are layered with parchment paper to prevent sticking. When you’re ready to enjoy, simply warm them on a skillet for about 30 seconds on each side until they’re pliable and ready for your favorite fillings. This meal prep tip not only keeps your tortillas fresh but also enhances their flavor, making your mealtime a breeze!
MINI TORTILLAS Recipe FAQs
What type of corn should I use for the best mini tortillas?
For the best flavor and texture, opt for masa harina, which is finely ground corn flour specifically designed for making tortillas. Look for brands like Maseca or Bob’s Red Mill—both yield delicious results. Fresh masa, if available, adds an authentic touch that elevates your mini tortillas to a whole new level!
How should I store leftover mini tortillas?
Once your mini tortillas have cooled completely, stack them with parchment paper between each tortilla to prevent sticking. Place them in an airtight container or resealable bag and store in the refrigerator for up to 5 days. If you’re planning to keep them longer, freezing is a great option!
Can I freeze mini tortillas?
Absolutely! To freeze your mini tortillas, layer them with parchment paper and place them in a freezer-safe bag or container. They can last in the freezer for up to 3 months. When you’re ready to use them, simply thaw them overnight in the refrigerator or warm them directly on a skillet for a few minutes until heated through.
Why are my mini tortillas cracking during cooking?
Cracking typically occurs when the dough is too dry or not properly hydrated. Ensure you’re using enough water when mixing the dough—aim for a soft, pliable texture that feels slightly tacky but isn’t sticky. If you notice cracks while cooking, try reducing the heat slightly and covering the pan with a lid to create steam, which helps keep them moist during cooking.
Are mini tortillas gluten-free?
Yes! When made with masa harina, mini tortillas are naturally gluten-free, making them suitable for those with gluten sensitivities or celiac disease. Just be sure to check the packaging for any cross-contamination warnings if you’re particularly sensitive.
What can I serve with my mini tortillas?
The possibilities are endless! Try pairing them with fresh salsa, guacamole, or as a base for tacos filled with your favorite proteins and veggies. You can also use mini tortillas as a fun appetizer by stacking them with cheese and toppings, then baking until crispy—perfect for sharing at family gatherings!
Mini Tortillas
Ingredients
Method
- Gather ingredients. Start by assembling your flour or corn masa, water, and a pinch of salt. Fresh ingredients make all the difference in taste and texture!
- Mix dough. In a large bowl, combine the masa with water and salt, stirring until a soft, pliable dough forms—about 3 to 5 minutes of mixing should do the trick.
- Divide dough. Pinch off small portions of the dough and roll them into balls, roughly the size of golf balls.
- Flatten balls. Using a tortilla press or rolling pin, flatten each ball into a thin circle—aim for about ¼ inch thick.
- Heat skillet. Preheat a dry skillet over medium-high heat until hot—this typically takes about 2 minutes.
- Cook tortillas. Place each flattened tortilla onto the skillet and cook for about 30 seconds on one side until bubbles form, then flip and cook for another 30 seconds until lightly browned.
- Keep warm. As you cook each tortilla, stack them on a plate and cover with a clean kitchen towel to keep them warm and soft while you finish cooking the rest.