Imagine sinking your teeth into a warm, flaky pastry puff that bursts with the rich, creamy goodness of Irish beer cheese, sending your taste buds on a delightful adventure. The comforting aroma wafts through the air, inviting everyone to gather around and indulge in these irresistible bites that are perfect for game nights or cozy gatherings.
These Irish Beer Cheese Puffs hold a special place in my heart, reminding me of laughter-filled evenings spent with friends while savoring every cheesy morsel. With each bite, you’ll discover layers of flavor that dance on your palate, making every occasion feel like a celebration worth remembering.
Why Is Irish Beer Cheese Puffs So Irresistibly Good?
Delightfully flaky pastry envelops a rich, creamy filling that combines sharp cheddar and Irish stout beer for a flavor explosion. Quick to prepare, these puffs come together in just 45 minutes, making them perfect for last-minute gatherings. Versatile snacks or appetizers, they’re sure to impress guests at any occasion. Crowd-pleasing and utterly addictive, one bite will leave everyone asking for more!
Irish Beer Cheese Puffs Ingredients
For the Dough
- 1 sheet Puff Pastry (Thawed) – This flaky pastry is the perfect base for your Irish Beer Cheese Puffs, creating a delightful, crispy exterior.
For the Filling
- 1 cup Sharp Cheddar Cheese (Grated) – Provides a robust flavor that pairs beautifully with the creamy filling and beer.
- 1/2 cup Cream Cheese (Softened) – Adds richness and creaminess, ensuring a smooth texture throughout.
- 1/4 cup Irish Stout Beer – Infuses a deep, malty flavor that enhances the overall taste of these delicious puffs.
- 1 teaspoon Dijon Mustard – A touch of tanginess that balances the richness of the cheeses perfectly.
- 1/2 teaspoon Garlic Powder – For an aromatic kick that elevates the cheese mixture to new heights.
- 1/4 teaspoon Black Pepper – Adds subtle warmth and depth to the flavor profile of your filling.
- 1 egg Egg (Beaten, for egg wash) – This will give your puffs a golden-brown finish when baked.
How to Make Irish Beer Cheese Puffs
1. Combine the Filling: In a mixing bowl, combine 1 cup of grated sharp cheddar cheese, 1/2 cup of softened cream cheese, 1/4 cup of Irish stout beer, 1 teaspoon of Dijon mustard, 1/2 teaspoon of garlic powder, and 1/4 teaspoon of black pepper. Mix until well combined, creating a creamy and flavorful filling.
2. Preheat the Oven: Preheat your oven to 400°F (200°C). Roll out 1 sheet of thawed puff pastry on a lightly floured surface and cut it into squares about 3×3 inches. This will be the delightful shell for your puffs.
3. Fill the Pastry: Place a tablespoon of the cheese filling in the center of each pastry square. Carefully fold the corners over to meet in the center and pinch to seal them tightly. These little parcels will hold all that cheesy goodness!
4. Brush with Egg Wash: Brush the tops with the beaten egg for a golden finish. This step is essential for that beautiful crispiness you’ll love once baked!
5. Bake to Perfection: Place the puffs on a baking sheet lined with parchment paper and bake for 20-25 minutes, or until they are golden brown and puffed up beautifully. The aroma will be irresistible!
6. Cool and Serve: Remove from the oven and let cool slightly before serving these warm Irish Beer Cheese Puffs to your family or guests. They’ll be delighted!
Optional: Garnish with fresh herbs for an extra touch.
Exact quantities are listed in the recipe card below.
Tips for the Best Irish Beer Cheese Puffs
- Perfect Pastry Temperature: Use thawed puff pastry that’s slightly chilled for better handling and flakiness. Warm pastry can become sticky and hard to work with.
- Cheese Blend: For an extra flavor boost, mix in some grated Gruyère or a sprinkle of smoked cheese with the sharp cheddar to enhance the richness.
- Seal Thoroughly: Ensure the edges of the pastry are pinched tightly to avoid any filling leaking out during baking. A good seal is key to perfect Irish Beer Cheese Puffs.
- Egg Wash Application: Apply the egg wash gently; too much can lead to sogginess. Just a light brush will give a beautiful golden finish without weighing down the pastry.
- Baking Sheet Prep: Line your baking sheet with parchment paper for easy removal and to prevent sticking. This also helps achieve an even bake for your puffs.
- Cooling Time: Allow the puffs to cool slightly before serving; this helps set the filling and prevents burns while enjoying these delicious bites.
How to Store and Freeze Irish Beer Cheese Puffs
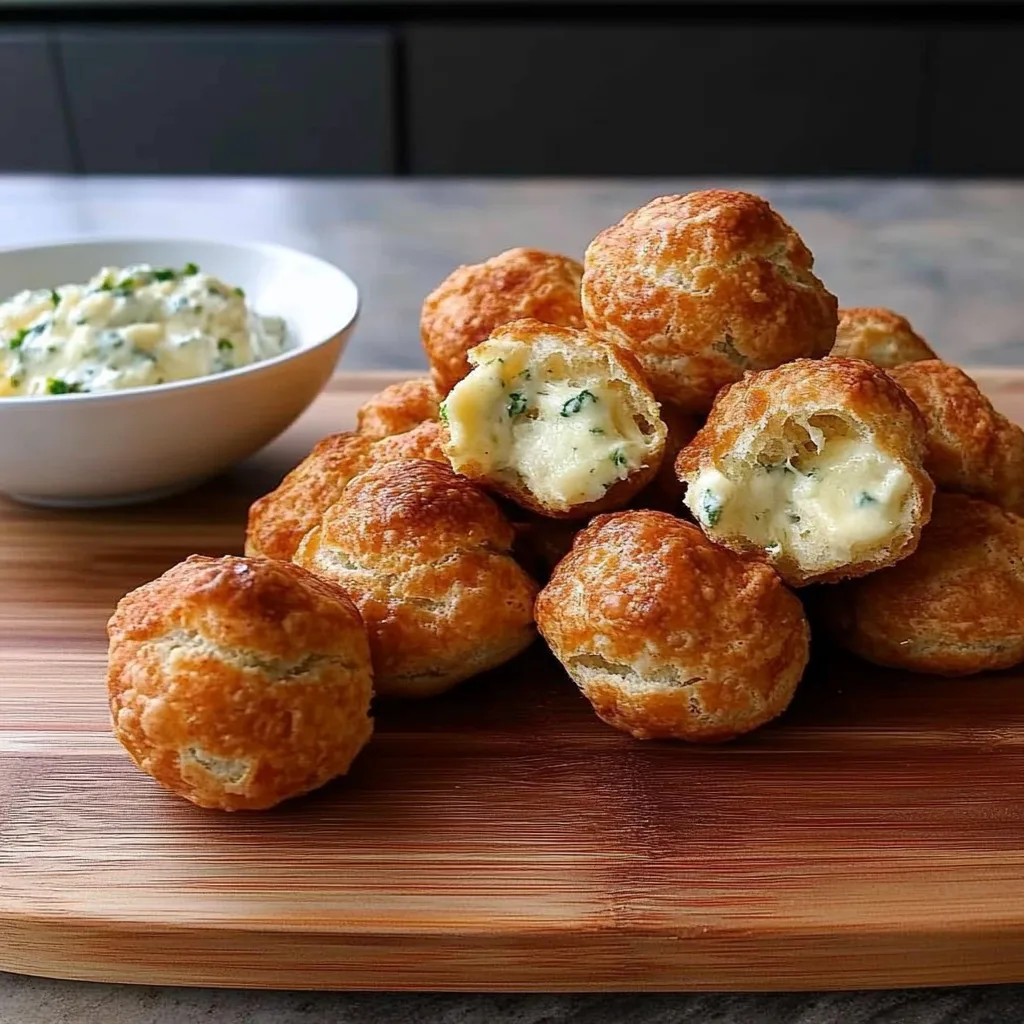
- Fridge: Store cooked Irish Beer Cheese Puffs in an airtight container for up to 3 days to maintain their flaky texture and rich flavor.
- Freezer: For longer storage, freeze unbaked puffs on a baking sheet until solid, then transfer to a freezer bag for up to 3 months.
- Reheating: Reheat baked puffs in a preheated oven at 375°F (190°C) for about 10-15 minutes until warmed through and crispy again.
- Thawing: When ready to bake frozen puffs, thaw in the fridge overnight before baking as directed for the best results.
Irish Beer Cheese Puffs Your Way
Feel free to get creative and tailor these delightful bites to suit your taste preferences.
- Spicy Kick: Add 1/4 teaspoon cayenne pepper for a fiery twist. This will elevate the flavor profile, making each bite a flavorful explosion perfect for spice lovers.
- Herbed Delight: Mix in 1 tablespoon of fresh chopped chives or parsley for an herbal freshness. It not only enhances the taste but also adds a lovely pop of color to your puffs.
- Smoky Flavor: Incorporate 1/2 teaspoon of smoked paprika into the filling for a depth of flavor. The smokiness pairs beautifully with the richness of the cheese and beer, creating a memorable experience.
- Veggie Boost: Fold in 1/2 cup of sautéed mushrooms or spinach for added nutrition and texture. This variation introduces earthiness that balances perfectly with the creaminess of the cheese.
- Cheese Variety: Swap sharp cheddar for Gruyère or fontina cheese for a different melty experience. Each cheese brings its own unique flavor, allowing you to explore new tastes in every batch.
- Crunchy Topping: Sprinkle panko breadcrumbs on top before baking for an extra crunchy finish. This adds delightful texture to your puffs, making them even more irresistible.
- Gluten-Free Option: Use gluten-free puff pastry instead of traditional dough. This ensures everyone can enjoy these tasty treats without compromising on flavor or texture.
- Nutty Twist: Mix in 1/4 cup of crumbled blue cheese for a bold flavor kick. The tangy notes from the blue cheese create an exciting contrast with the creamy filling, perfect for adventurous eaters!
Make Ahead Options
If you’re looking to simplify your entertaining or weeknight dinners, these Irish Beer Cheese Puffs are perfect for meal prep! You can prepare the filling—combining the sharp cheddar cheese, cream cheese, Irish stout beer, Dijon mustard, garlic powder, and black pepper—up to 3 days in advance. Just store it in an airtight container in the refrigerator. Additionally, you can roll out the puff pastry and cut it into squares up to 24 hours ahead of time; simply cover them with a damp cloth to prevent drying out. When you’re ready to serve, assemble the puffs by placing a tablespoon of filling in the center of each pastry square and pinching them closed. Brush with beaten egg for that golden finish before baking at 400°F (200°C) for 20-25 minutes until they’re beautifully puffed and golden brown. These steps will ensure your Irish Beer Cheese Puffs are fresh and delicious when it’s time to impress your guests!
Irish Beer Cheese Puffs Recipe FAQs
What type of cheese works best for the filling?
Sharp cheddar cheese is ideal for these Irish Beer Cheese Puffs as it provides a robust flavor that pairs beautifully with the creaminess of the cream cheese. If you’re looking for alternatives, you could try using a blend of Gruyère and fontina for a more decadent twist.
Can I make these puffs ahead of time?
Absolutely! You can prepare the filling and assemble the puffs up to 24 hours in advance. Just store them covered in the refrigerator. When you’re ready to bake, brush them with the egg wash and pop them in a preheated oven at 400°F (200°C) for 20-25 minutes until they are golden brown.
How do I store leftovers?
To keep your Irish Beer Cheese Puffs fresh, allow them to cool completely before storing. Place them in an airtight container and refrigerate for up to 3 days. Reheat in the oven at 350°F (175°C) for about 10 minutes until warmed through, ensuring they stay flaky.
Can I freeze the assembled puffs?
Yes! These delightful puffs freeze wonderfully. After assembling, place them on a baking sheet lined with parchment paper and freeze until solid. Once frozen, transfer them to a freezer-safe bag or container. When you’re ready to bake, there’s no need to thaw—just brush with egg wash and bake straight from the freezer, adding an extra few minutes to the baking time.
What can I serve with these puffs?
These Irish Beer Cheese Puffs are fantastic on their own but pair beautifully with a tangy dipping sauce like honey mustard or a spicy tomato chutney. For a complete appetizer spread, consider serving them alongside charcuterie items like cured meats and olives.
How many servings does this recipe yield?
This recipe yields about 4 servings, with each serving consisting of approximately 3-4 puffs depending on how generous you are with your filling! Each delicious puff contains around 180 calories, making them a perfect snack or appetizer for gatherings.
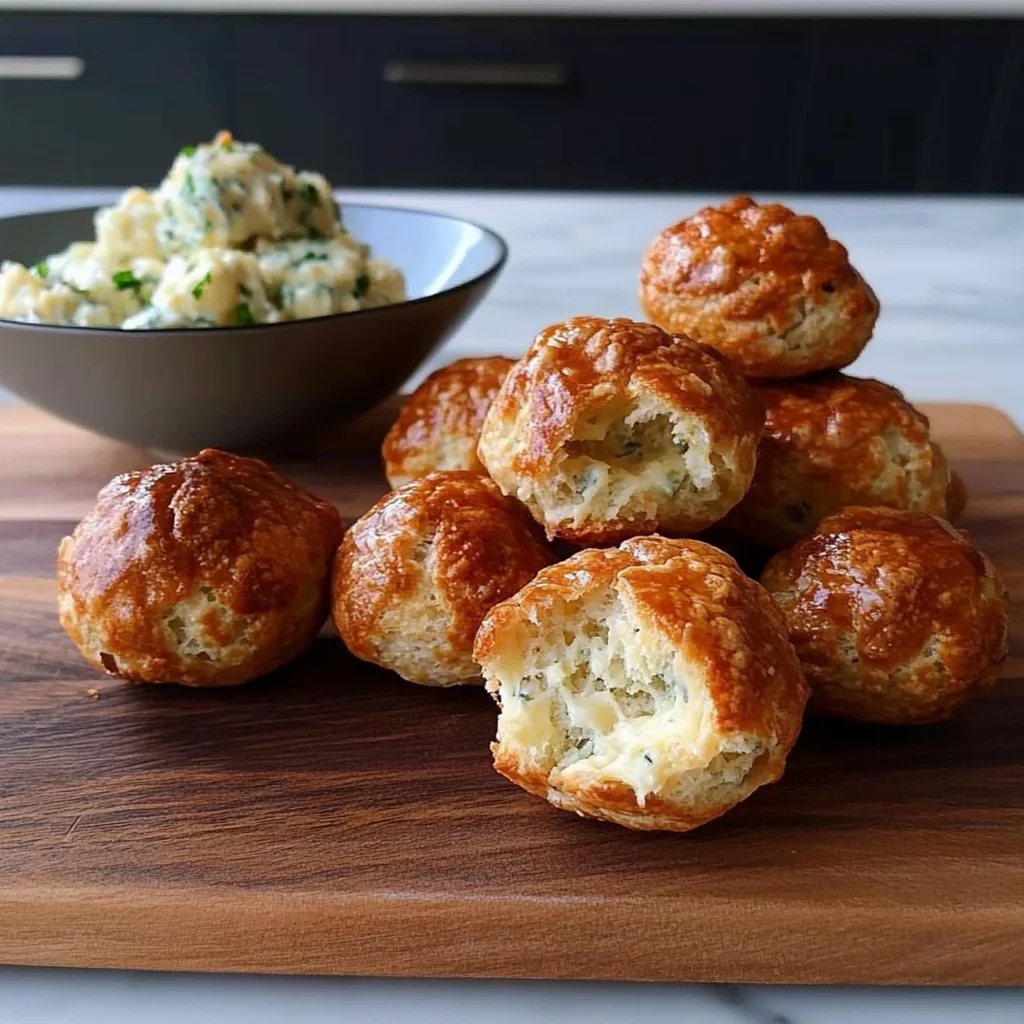
Irish Beer Cheese Puffs
Ingredients
Method
- In a mixing bowl, combine the sharp cheddar cheese, cream cheese, Irish stout beer, Dijon mustard, garlic powder, and black pepper. Mix until well combined.
- Preheat the oven to 400°F (200°C). Roll out the puff pastry on a lightly floured surface and cut it into squares (about 3x3 inches).
- Place a tablespoon of the cheese filling in the center of each pastry square. Fold the corners over to meet in the center and pinch to seal.
- Brush the tops with the beaten egg for a golden finish.
- Place the puffs on a baking sheet lined with parchment paper and bake for 20-25 minutes, or until golden brown and puffed up.
- Remove from the oven and let cool slightly before serving. Enjoy warm!