Imagine sinking your teeth into a warm, gooey slice of chocolate chip cookie pie, where the rich aroma of melted chocolate mingles with the buttery scent of freshly baked dough. Each bite delivers a delightful crunch on the outside and a chewy, decadent center that’s simply irresistible, making it the perfect treat for any occasion, whether it’s a cozy family gathering or a festive celebration.
This cookie pie has a special place in my heart, reminiscent of lazy Sunday afternoons spent in the kitchen with my grandmother, who always said that dessert should be an adventure. As we mixed the ingredients and shared laughs, I learned that every slice tells a story, promising an explosion of flavors that will leave you craving just one more piece. Get ready to indulge in a flavor experience that’s both nostalgic and utterly delicious.
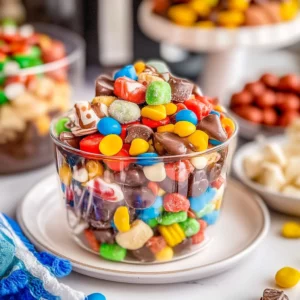
Why will you crave Homemade Lucky Charm Cereal Bars Recipe?
Irresistibly fun and colorful, these bars are perfect for kids and adults alike!
Quick to make, whip them up in just 15 minutes.
Deliciously chewy, they combine the magic of marshmallows with crunchy cereal.
Perfect for parties, these treats are sure to impress guests.
Customizable delight, add your favorite mix-ins for a personal touch!
Homemade Lucky Charm Cereal Bars Recipe Ingredients
For the Base
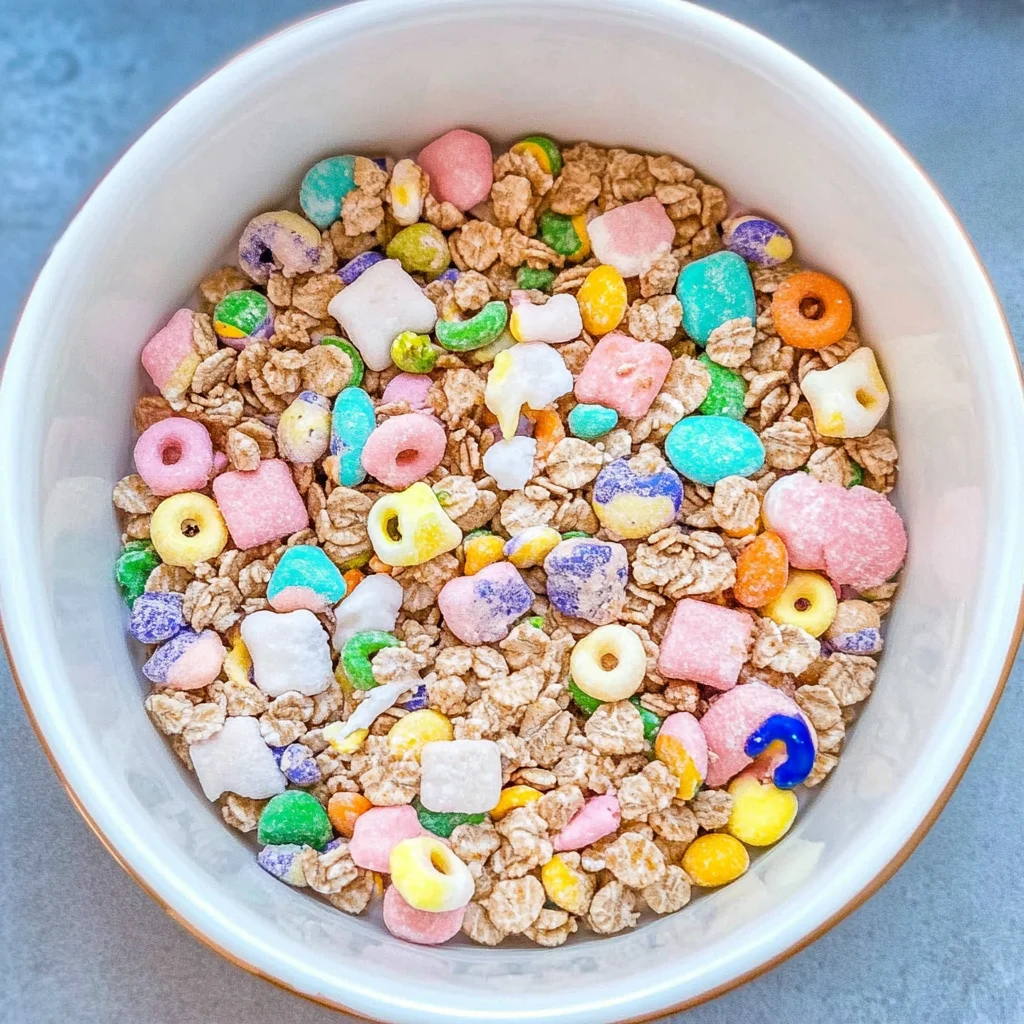
- Lucky Charms cereal – this colorful cereal adds sweetness and a touch of nostalgia to your bars.
- Marshmallows – use mini marshmallows for an extra gooey texture that binds everything together.
- Butter – melting butter helps create a rich flavor while ensuring your bars hold their shape.
- Honey or corn syrup – acts as a natural sweetener, keeping your bars chewy and delicious.
For the Topping
- Chocolate chips – sprinkle these on top for a delightful chocolatey finish that complements the marshmallows perfectly.
- Sprinkles (optional) – add a festive touch with vibrant sprinkles, making them even more fun for kids!
These simple ingredients make the Homemade Lucky Charm Cereal Bars Recipe a delightful treat for all occasions!
How to Make Homemade Lucky Charm Cereal Bars Recipe
1. Gather Ingredients: Start by collecting all your ingredients: Lucky Charms cereal, marshmallows, butter, and a pinch of salt. This will make the process smooth and enjoyable!
2. Melt Butter: In a large saucepan over medium heat, melt 3 tablespoons of butter until bubbly. Keep stirring to avoid burning. You want it perfectly golden and fragrant!
3. Add Marshmallows: Once the butter melts, add 4 cups of mini marshmallows to the pan. Stir continuously until they melt into a gooey mixture that’s smooth and shiny.
4. Mix in Cereal: Remove the pan from heat and quickly fold in 6 cups of Lucky Charms cereal. Mix gently until every piece is coated in that sweet, sticky marshmallow goodness.
5. Press into Pan: Line a 9×13-inch baking dish with parchment paper for easy removal. Pour the mixture into the dish and press it down firmly with a spatula, creating an even layer.
6. Cool Completely: Let the bars cool at room temperature for about 30 minutes or until they are set and firm to the touch. This is the hardest part—waiting for those delicious treats!
7. Slice & Serve: Once cooled, lift the bars out using the parchment paper and cut them into squares or rectangles. Enjoy each delightful bite with friends or family!
Optional: Drizzle melted chocolate on top for an extra touch of sweetness!
Exact quantities are listed in the recipe card below.
Expert Tips
- Perfectly Sticky Mixture: Ensure your marshmallow and butter mixture is well combined; this creates the perfect sticky consistency for your Homemade Lucky Charm Cereal Bars.
- Press Firmly: When spreading the mixture into the pan, press it down firmly with a spatula. This prevents bars from crumbling when cut.
- Cool Completely: Allow your bars to cool completely before slicing; warm bars are too soft and will fall apart, ruining your Homemade Lucky Charm Cereal Bars Recipe.
- Store Properly: Keep bars in an airtight container at room temperature. This helps maintain freshness and prevents them from getting stale.
- Customize Your Mix: Feel free to add other mix-ins like chocolate chips or nuts for added flavor and texture variations in your homemade treat!
Storage Tips for Homemade Lucky Charm Cereal Bars Recipe

- Room Temperature: Store your Homemade Lucky Charm Cereal Bars in an airtight container for up to 3 days. This keeps them fresh and chewy without any fuss!
- Fridge: For longer-lasting bars, refrigerate them in an airtight container for up to a week. This helps maintain their texture and flavor while keeping them cool.
- Freezer: You can freeze your Homemade Lucky Charm Cereal Bars wrapped tightly in plastic wrap and then stored in a freezer-safe bag for up to 2 months. Just thaw before enjoying!
- Reheating: If you prefer warm bars, pop them in the microwave for about 10-15 seconds. This will bring back that delightful gooeyness that everyone loves!
Homemade Lucky Charm Cereal Bars Recipe Variations
Get ready to put your own spin on these delightful bars with simple swaps and fun flavor twists!
- Nut-Free: Swap out the nut butter for sunbutter or soy nut butter for a safe, delicious alternative. This way, everyone can enjoy these treats without worry!
- Gluten-Free: Use gluten-free rice cereal instead of regular to cater to those with dietary restrictions. It’s an easy switch that keeps the cheerful crunch intact.
- Chocolatey Delight: Mix in mini chocolate chips for an extra layer of indulgence. The melty chocolate will elevate each bite into a sweet dream!
- Fruit Fusion: Add dried fruits like cranberries, apricots, or banana chips for a fruity twist. This not only enhances the flavor but also adds a chewy texture.
- Spicy Kick: Sprinkle in a dash of cayenne pepper or chili powder for a surprising heat. The warmth will dance beautifully alongside the sweetness of the marshmallows.
- Vegan-Friendly: Substitute honey with agave syrup or maple syrup to keep this recipe plant-based. It’ll still hold together perfectly while being kind to your vegan friends!
- Nutty Crunch: Toss in chopped almonds or pecans for added texture and flavor. The crunchiness complements the soft bars beautifully, making each bite a delight.
- Marshmallow Madness: Use flavored marshmallows, like strawberry or blue raspberry, for a vibrant twist. This fun change adds both color and taste, making them even more appealing!
Make Ahead Options
If you’re looking to streamline your mornings or prepare a delightful snack for the week, this Homemade Lucky Charm Cereal Bars Recipe is perfect for meal prep. To get ahead, you can measure out the dry ingredients—such as 3 cups of Lucky Charms cereal and 1 cup of mini marshmallows—up to 24 hours in advance and store them in an airtight container. Additionally, you can melt the butter and marshmallows together (about 5 minutes) and let it cool slightly before combining it with the cereal mixture; this can be done up to 3 days ahead of time. Just remember to reheat gently if it firms up too much. When you’re ready to enjoy these tasty bars, simply mix everything together and press the mixture into a lined baking dish—your delicious treats will be ready in no time!
Homemade Lucky Charm Cereal Bars Recipe FAQs
What type of marshmallows should I use for my cereal bars?
For the best flavor and texture, I recommend using mini marshmallows. They melt evenly and mix beautifully with the cereal, creating those delightful chewy bites. Regular-sized marshmallows can work too, but you’ll need to chop them into smaller pieces for a more uniform mix.
How should I store my Lucky Charm cereal bars?
Store your homemade cereal bars in an airtight container at room temperature for up to one week. If you want to keep them fresh longer, consider refrigerating them where they can last for up to two weeks. Just remember to let them come to room temperature before enjoying for that perfect chewy texture!
Can I freeze Lucky Charm cereal bars?
Absolutely! These bars freeze wonderfully. Wrap each bar individually in plastic wrap and place them in a freezer-safe bag or container. They can be frozen for up to three months. When you’re ready to enjoy, simply thaw them in the fridge overnight or at room temperature for a couple of hours.
What if my bars are too sticky or crumbly?
If your bars turn out too sticky, it might be because the marshmallow mixture was not heated enough or there were too many marshmallows used. Try melting the mixture just until bubbly and then mixing it thoroughly with the cereal; this will help bind everything together better. If they’re crumbly, you may need a bit more melted marshmallow or even a touch of butter to help hold everything together.
Are there any dietary alternatives I can use?
Definitely! For a gluten-free option, make sure you’re using certified gluten-free rice cereal and marshmallows. If you want to make these vegan, use plant-based butter and dairy-free marshmallows. You can also swap out Lucky Charms with other cereals that suit your dietary needs while still maintaining that fun flavor!
Can I add other ingredients to my cereal bars?
Yes! Feel free to get creative by adding mix-ins like chocolate chips, nuts, or dried fruits. Just keep in mind that adding too many extras might affect the binding and texture of your bars. Aim for about 1/2 cup of additional ingredients for every batch without compromising the core recipe!
Homemade Lucky Charm Cereal Bars
Ingredients
Method
- Gather Ingredients: Start by collecting all your ingredients: Lucky Charms cereal, marshmallows, butter, and a pinch of salt.
- Melt Butter: In a large saucepan over medium heat, melt 3 tablespoons of butter until bubbly. Keep stirring to avoid burning.
- Add Marshmallows: Once the butter melts, add 4 cups of mini marshmallows to the pan. Stir continuously until they melt into a gooey mixture.
- Mix in Cereal: Remove the pan from heat and quickly fold in 6 cups of Lucky Charms cereal. Mix gently until every piece is coated.
- Press into Pan: Line a 9x13-inch baking dish with parchment paper and pour the mixture into the dish, pressing it down firmly.
- Cool Completely: Let the bars cool at room temperature for about 30 minutes or until they are set and firm to the touch.
- Slice & Serve: Once cooled, lift the bars out using the parchment paper and cut them into squares or rectangles.