The charming aroma of freshly baked cake wafts through your kitchen, instantly creating a warm, cozy atmosphere that feels like a hug for your senses. These delightful CAKE PUCKS are not just sweet bites; they are tiny bites of joy that transport you back to your childhood days when dessert was the highlight of every meal. With their rich red velvet flavor and the unexpected crunch of Oreo thins, you’ll find it difficult to resist popping one (or three) into your mouth. Perfect for parties or simply when you’re craving something sweet, you’ll wonder how you ever lived without this treat.
Imagine gathering around with your loved ones, sharing stories and laughter, while devouring these indulgent CAKE PUCKS. Each bite delivers a fluffy texture and a luscious layer of buttercream that tickles your taste buds and makes you yearn for just one more. Whether it’s a birthday bash, a holiday gathering, or even a lonely Tuesday, these pucks will add a sprinkle of happiness to any occasion. Get ready for a fun culinary adventure that’ll tease not just your palate, but your creativity too!
Why You'll Love This CAKE PUCKS
- This incredible CAKE PUCKS transforms simple everyday ingredients into restaurant-quality flavors that will blow your mind completely.
- Foolproof recipe techniques guarantee perfect results every single time, making even novice cooks feel like professional chefs instantly.
- Stunning visual appeal with gorgeous colors and mouthwatering aromas creates the ultimate Instagram-worthy dish for any special occasion.
- Endlessly adaptable for different dietary needs while working beautifully for meal prep, date nights, or entertaining large groups effortlessly.
Ingredients for CAKE PUCKS
Here’s what you’ll need to make this delicious CAKE PUCKS:
1 box red velvet cake mix – The star ingredient that brings that classic flavor and vibrant color to your pucks.
1 cup water – Essential for mixing the cake batter and ensuring it’s moist and fluffy.
1/3 cup oil – Helps add richness and moisture to the cake batter for that soft, tender texture.
2 eggs – Acts as a binding agent to hold your CAKE PUCKS together and encourage rise.
1 tsp vanilla – A splash of this fragrant ingredient enhances the flavors and makes everything taste heavenly.
Oreo thins – The perfect surprise element, providing a delightful crunch and chocolatey flavor to your pucks.
1/2 cup buttercream – Creamy goodness that binds the crumbled cake together and adds extra flavor.
Ghirardelli melting wafers, dark chocolate – The finishing touch to coat your pucks and add a luscious, decadent layer of chocolate.
How to Make CAKE PUCKS
Follow these simple steps to prepare this delicious CAKE PUCKS:
Step 1: Mix the Batter
Preheat your oven to 350°F (175°C) and grease a 9×13 baking pan. In a large mixing bowl, combine the red velvet cake mix, water, oil, eggs, and vanilla. Blend all the ingredients until the mixture is smooth and free from lumps.
Step 2: Bake the Cake
Pour your batter into the greased baking pan, spreading it evenly. Bake in the preheated oven for about 25 minutes, or until a toothpick inserted into the center comes out clean. Allow the cake to cool completely in the pan.
Step 3: Crumble & Mix
Once cooled, crumble the cake into a large bowl until it resembles fine crumbs. Add the buttercream and mix until everything is combined, creating a moist, moldable texture.
Step 4: Mold the Cake Pucks
Take about a tablespoon of the cake mixture and press it into your small cake puck mold. Place an Oreo thin on top of the mix, and then fill the mold with more cake mixture. Use the bottom of a measuring cup to level off the top, scraping away any excess.
Step 5: Chill the Pucks
Place the filled mold in the fridge for 3 hours or the freezer for 45 minutes to allow them to firm up a bit. This step is crucial for maintaining their shape during the next stage.
Step 6: Coat with Chocolate
While your CAKE PUCKS chill, melt 17 ounces of dark chocolate with one tablespoon of refined coconut oil in a microwave-safe bowl. Heat in one-minute intervals, stirring until smooth. Fill the larger mold cavities with the melted chocolate, about halfway, and carefully press in the chilled centers.
Step 7: Final Freezing
Ensure the chocolate completely covers the pucks by gently pressing. Tap the mold on the counter to eliminate any air bubbles and scrape off any excess chocolate. Return the mold to the freezer for about 10 minutes to set before popping them out.
Transfer your delightful CAKE PUCKS to a serving platter, and get ready to enchant your guests with these beautiful, bite-sized treats. Whether you share them or keep them all to yourself (we won’t judge), they’re sure to be an instant hit!

You Must Know About CAKE PUCKS
- This showstopping CAKE PUCKS delivers restaurant-quality results using simple ingredients you probably already have at home.
- The perfect balance of textures and flavors creates an unforgettable dining experience that will have everyone asking for seconds.
- Picture-perfect presentation with vibrant colors makes this dish absolutely Instagram-worthy and guaranteed to impress any dinner guest.
- Incredibly versatile recipe that works beautifully for weeknight dinners, meal prep, special occasions, or even outdoor entertaining sessions.
Perfecting CAKE PUCKS Cooking Process
Start by baking the red velvet cake first, allowing it ample time to cool. While it’s cooling, prepare your chocolate and mold—this way, the cake frontloads most of the work for you. It’s an efficient method that ensures perfect CAKE PUCKS in no time.
Add Your Touch to CAKE PUCKS
Feel free to swap the red velvet cake mix for a different flavor if you fancy a twist. Adding some chopped nuts or chocolate chips can elevate the texture. For an extra pop, consider drizzling a flavored icing on top for a unique flair that’s all yours.
Storing & Reheating CAKE PUCKS
Store your CAKE PUCKS in an airtight container in the fridge for up to a week. To reheat, pop them in the microwave for a few seconds—just enough to warm them without compromising texture or flavor.
Chef's Helpful Tips for CAKE PUCKS
- This professional-quality CAKE PUCKS relies on precise timing and temperature control to achieve restaurant-standard results consistently.
- Master the art of mise en place by prepping all ingredients beforehand, ensuring smooth execution and preventing any last-minute cooking disasters.
- The secret lies in layering flavors throughout the cooking process rather than seasoning only at the end for maximum depth.
- Pro tip: let the finished dish rest for optimal texture and flavor development before serving to hungry guests waiting eagerly.
Experimenting with these CAKE PUCKS has led to countless laughs and great moments in the kitchen, especially when my friends texted about how they couldn’t resist eating them all in one sitting.

FAQs About CAKE PUCKS
What is CAKE PUCKS?
CAKE PUCKS are delightful, bite-sized treats made by crumbling moist red velvet cake mixed with buttercream and encased in rich chocolate. They are similar to cake pops but often offer a denser and more indulgent experience. The twist of placing an Oreo thin in the center adds an extra layer of flavor and texture. Perfect for parties or a sweet pick-me-up, these treats are sure to impress with their vibrant color and delicious taste.
How long do I need to chill CAKE PUCKS?
To achieve the best results with your CAKE PUCKS, chilling is essential. You can chill them in the fridge for about three hours or opt for a quicker method by freezing them for 45 minutes. Chilling allows the cake and chocolate to firm up, making them easier to handle and ensuring a delightful texture when you take a bite. Remember, patience is key to delectable treats!
Can I customize my CAKE PUCKS?
Absolutely! One of the best things about CAKE PUCKS is their versatility. You can easily switch the red velvet cake mix for any other flavor you love, like chocolate or vanilla. Feel free to fold in some chopped nuts or chocolate chips for a crunchy surprise. Drizzling with flavored icing can also add a personalized touch and boost their charm at your next gathering.
How should I store CAKE PUCKS?
To keep your CAKE PUCKS fresh, store them in an airtight container in the refrigerator for up to a week. Make sure they are well-sealed to prevent any moisture from ruining their delightful texture. If you’re looking to enjoy them later, they can also be frozen. Just remember to let them sit at room temperature for a few minutes before enjoying to regain that luscious bite!
Conclusion for CAKE PUCKS
In summary, CAKE PUCKS are a fun and delicious way to enjoy a classic dessert in an innovative format. With their easy preparation and endless customization options, they are perfect for any occasion. Remember to chill them adequately for the best texture, and don’t shy away from including your favorite flavors. Whether it’s a family gathering or a sweet treat for yourself, CAKE PUCKS are sure to bring joy and satisfaction. Enjoy creating and sharing these delightful bites!
Delicious Red Velvet Cake Pucks Recipe for Sweet Treat Lovers
Ingredients
Equipment
Method
- Combine cake mix, eggs, water, oil, and vanilla until fully mixed.
- Pour mixture into a greased 9×13 baking pan and bake at 350°F until done, testing with a toothpick in the center of the cake (about 25 minutes).
- Allow the cake to cool, then crumble and mix in buttercream.
- Add about a tablespoon of cake mix to your small cake puck mold. Place one Oreo thin on top of the mix and fill the mold with cake mix.
- Use the bottom of a measuring cup to gently pat the top of the cake puck centers down so they are level with the mold. Scrape off any excess mix.
- Place the mold in the fridge for 3 hours or freeze for 45 minutes to chill.
- Melt 17 ounces of chocolate with one tablespoon of refined coconut oil for 1 minute. Continue to microwave in increments of 20 seconds until chocolate is smooth and fully melted.
- Fill cavities of the larger mold with chocolate a little less than half-full. Place the chilled center on the melted chocolate.
- Gently apply even pressure as you slowly press the center down until chocolate comes up from the sides and covers the top of the center. Scrape off any excess chocolate.
- If there is not enough chocolate to cover the center, add chocolate and scrape off excess. Tap the mold tray on the counter to eliminate air bubbles.
- Place the mold in the freezer for 10 minutes to set.
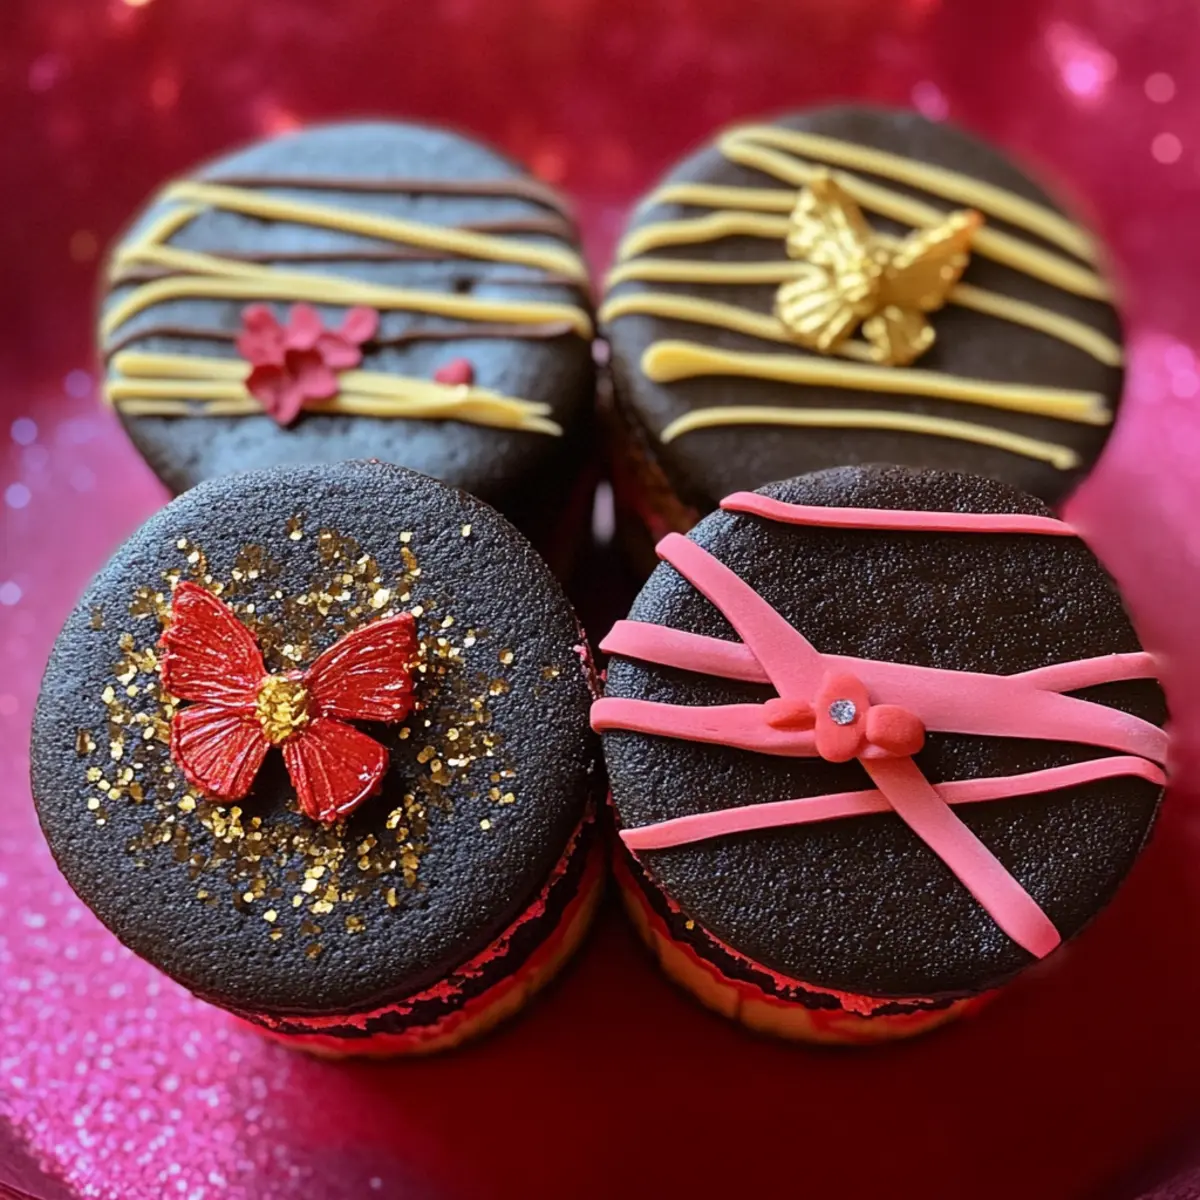
- Un-mold and decorate your little cake pucks.