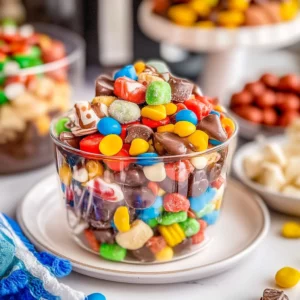
Imagine diving into a bowl of Ben and Jerry’s ice cream, where every spoonful is a cloud of creamy bliss, bursting with rich flavors that dance on your taste buds. The sweet aroma wafts through the air, inviting you to indulge in its velvety texture, making it impossible to resist this iconic treat that feels like a warm hug on a hot summer day.
As I recall childhood afternoons spent sharing pints with friends while binging our favorite shows, the joy of creating my own version of Ben and Jerry’s ice cream floods back. It’s the perfect way to celebrate life’s little moments or simply treat yourself after a long day; each scoop promises an adventure in flavor that will leave you craving more.
Why Is ben and jerrys ice cream So Irresistibly Good?
Rich and creamy, this homemade version captures the essence of your favorite scoop shop. Simple ingredients like heavy cream and whole milk ensure a velvety texture that melts in your mouth. Customize with mix-ins such as chocolate chips or crushed Oreos for a fun twist. Quick to prepare in just 15 minutes, it’s perfect for any occasion. Impress your friends and family with delicious flavors that rival the iconic brand!
ben and jerrys ice cream Ingredients
- For the Base
- 2 cups Heavy Cream – This rich cream provides a luscious texture that makes your ice cream indulgently creamy.
- 1 cup Whole Milk – Whole milk adds a smooth consistency, enhancing the overall richness of your homemade treat.
- 3/4 cup Granulated Sugar – Sweetness is key; adjust to taste for that perfect balance in your ben and jerrys ice cream.
- 1 teaspoon Vanilla Extract – Pure vanilla enhances the flavor profile, making every scoop even more delightful.
- 1 pinch Salt – A tiny pinch of salt elevates the sweetness, making the flavors pop beautifully.
- For the Flavor Mix-ins
- 1 cup Chocolate Chips (Optional) – These add a delicious burst of chocolatey goodness in every bite, perfect for chocolate lovers!
- 1/2 cup Crushed Oreos (Optional) – Crushed Oreos bring a cookie crunch and nostalgic flavor that pairs wonderfully with vanilla ice cream.
- 1/2 cup Chopped Nuts (Optional) – Nuts provide a satisfying crunch and can be any variety you love, like walnuts or pecans.
- 1/2 cup Fruit Puree (Optional) – Use fresh fruit puree for a refreshing twist; berries or peaches work exceptionally well!
Directions: ben and jerrys ice cream
1. Whisk Together: In a mixing bowl, whisk together 2 cups of heavy cream, 1 cup of whole milk, 3/4 cup of granulated sugar, 1 teaspoon of vanilla extract, and a pinch of salt until the sugar is completely dissolved and the mixture is smooth.
2. Chill the Mixture: Cover the mixture and refrigerate for at least 2 hours or overnight. This chilling step helps enhance the flavors and ensures a creamy texture.
3. Churn the Ice Cream: Pour the chilled mixture into your ice cream maker and churn according to the manufacturer’s instructions. You’ll know it’s ready when it reaches a soft-serve consistency—this usually takes about 20-25 minutes!
4. Fold in Mix-ins: If desired, gently fold in your choice of mix-ins such as 1 cup of chocolate chips, 1/2 cup of crushed Oreos, or 1/2 cup of fruit puree for extra flavor and fun textures.
5. Freeze the Ice Cream: Transfer the ice cream to an airtight container and freeze for at least 2 hours to firm up before serving. This final step sets the perfect scoopable texture, so be patient!
Optional: For an extra crunch, sprinkle some chopped nuts on top before serving!
Exact quantities are listed in the recipe card below.
Pro Tips for ben and jerrys ice cream
- Chill Thoroughly: Make sure your ice cream base is well-chilled for at least 2 hours. This helps achieve a creamy texture similar to Ben and Jerry’s.
- Mix Gradually: When adding mix-ins like chocolate chips or Oreos, fold them in gently. This prevents them from sinking to the bottom during freezing.
- Monitor Churning Time: Avoid over-churning your ice cream; it should achieve a soft-serve consistency. Over-churning can lead to a grainy texture.
- Use Quality Ingredients: Opt for high-quality heavy cream and vanilla extract. The richer the ingredients, the more indulgent your homemade ben and jerrys ice cream will be.
- Don’t Skip the Salt: A pinch of salt enhances sweetness and balances flavors. It’s a small step that makes a big difference in taste.
- Proper Storage: Store your ice cream in an airtight container to prevent ice crystals from forming. This keeps it smooth and delicious!
How to Store and Freeze ben and jerrys ice cream
- Freezer: Store your homemade ben and jerrys ice cream in an airtight container for up to 2 weeks for the best texture and flavor.
- Fridge: If you have leftovers, keep them in the fridge for a maximum of 3 days, but be prepared for a softer consistency.
- Covering: Use plastic wrap pressed directly onto the surface of the ice cream before sealing the container to prevent ice crystals from forming.
- Mix-ins: If you added fruit puree or fresh ingredients, consume within 1 week to enjoy their freshness without risk of spoilage.
ben and jerrys ice cream Variations
Feel free to let your creativity shine by customizing this creamy delight with your favorite flavors and textures!
- Dairy-Free: Substitute coconut cream for heavy cream and almond milk for whole milk. Enjoy a tropical twist that’s both creamy and refreshing. Your taste buds will thank you for this delightful change!
- Chocolate Lovers: Increase the chocolate chips to 1 ½ cups for an ultra-chocolatey experience. This variation is perfect for those who can’t get enough of that rich cocoa flavor.
- Nutty Delight: Add 1/2 cup of peanut butter or any nut butter of your choice instead of chopped nuts. The result is a deliciously nutty base that pairs beautifully with chocolate or fruit.
- Minty Fresh: Incorporate 1 teaspoon of peppermint extract in place of vanilla extract for a refreshing mint ice cream. This adds a cool, invigorating flavor reminiscent of those classic mint chocolate chip treats.
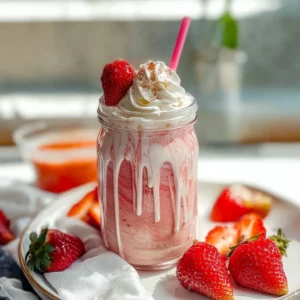
- Fruity Explosion: Use 1/2 cup of pureed strawberries, mango, or raspberries instead of the optional mix-ins. This fruity twist creates a vibrant and refreshing ice cream perfect for summer days.
- Cookie Dough Bliss: Fold in 1 cup of cookie dough pieces (homemade or store-bought) for a fun texture and flavor boost. Every bite will be a chewy surprise filled with sweet nostalgia!
- Spicy Kick: Add a pinch of cayenne pepper or chili powder to the base for an unexpected heat element. This unique twist will tantalize your taste buds and keep you coming back for more!
Make Ahead Options
This rich and creamy homemade ben and jerrys ice cream is perfect for meal prep, allowing you to indulge in your favorite flavors anytime. You can prepare the ice cream base by whisking together 2 cups of heavy cream, 1 cup of whole milk, 3/4 cup of granulated sugar, 1 teaspoon of vanilla extract, and a pinch of salt. Cover the mixture and refrigerate it for at least 2 hours or up to overnight for optimal flavor development. Once you’re ready to churn, simply pour the chilled mixture into your ice cream maker and follow the manufacturer’s instructions until it reaches that delightful soft-serve consistency. If you wish to add mix-ins like chocolate chips or crushed Oreos, do so gently before transferring the ice cream to an airtight container. Freeze it for at least 2 hours—or even up to 3 days—for a firm texture that’s perfect when you’re ready to serve. This thoughtful approach not only saves you time but ensures you always have a scoop of joy on hand!
ben and jerrys ice cream Recipe FAQs
What type of heavy cream should I use for the best texture?
Using a high-fat content heavy cream (at least 36% fat) will yield the richest and creamiest ice cream. Avoid lighter creams like half-and-half, as they won’t provide the same luxurious mouthfeel.
How long should I refrigerate the ice cream base before churning?
For optimal results, refrigerate your ice cream base for at least 2 hours, but overnight is even better! This allows the flavors to meld beautifully and ensures a smoother texture when churned.
Can I substitute any ingredients for a lighter version of this ice cream?
Absolutely! You can use whole milk instead of heavy cream or opt for low-fat milk to cut down on calories. Keep in mind that this may affect the richness; aim for about 1 cup of low-fat milk to maintain some creaminess while reducing calories from 300 per serving.
How can I store leftover ice cream?
Store any leftover ice cream in an airtight container in the freezer. It’s best consumed within 2-3 weeks for optimal flavor and texture, but it can last up to a month. Just let it sit at room temperature for a few minutes before scooping if it becomes too hard!
What mix-ins work best with this Ben and Jerry’s-inspired recipe?
You can really get creative here! Classic options include chocolate chips and crushed Oreos, while fruit purees like strawberry or mango add a fresh twist. For added crunch, consider chopped nuts. Aim for about 1 cup of mix-ins total for balanced flavor!
How many servings does this recipe yield?
This delightful homemade Ben and Jerry’s-style ice cream makes approximately 4 servings. Each serving clocks in at around 300 calories, perfect for sharing with family or indulging solo—just remember to savor every creamy spoonful!

Ben and Jerry's Ice Cream
Ingredients
Method
- In a mixing bowl, whisk together the heavy cream, whole milk, granulated sugar, vanilla extract, and salt until the sugar is dissolved.
- Cover the mixture and refrigerate for at least 2 hours or overnight for best results.
- Pour the chilled mixture into the ice cream maker and churn according to the manufacturer's instructions until it reaches a soft-serve consistency.
- If desired, gently fold in your choice of mix-ins such as chocolate chips, crushed Oreos, or fruit puree.
- Transfer the ice cream to an airtight container and freeze for at least 2 hours to firm up before serving.