
If you want a wearable, multi-season sweater that combines joyful colorwork with rich surface texture, the Textured Stripes V-Neck Crochet Cardigan is a masterclass in smart garment construction. Worked in lustrous Caron® Simply Soft® with a 5.0 mm (US H/8) hook, the lower body is crocheted in one seamless piece up to the armholes so you have zero side seams to sew. Better yet, the entire cardigan uses the Even Moss Stitch—alternating 1 hdc and 1 sl st across 4-row color bands—creating a nubby, knit-like fabric framed by a sleek 5-row back-loop single crochet front band.
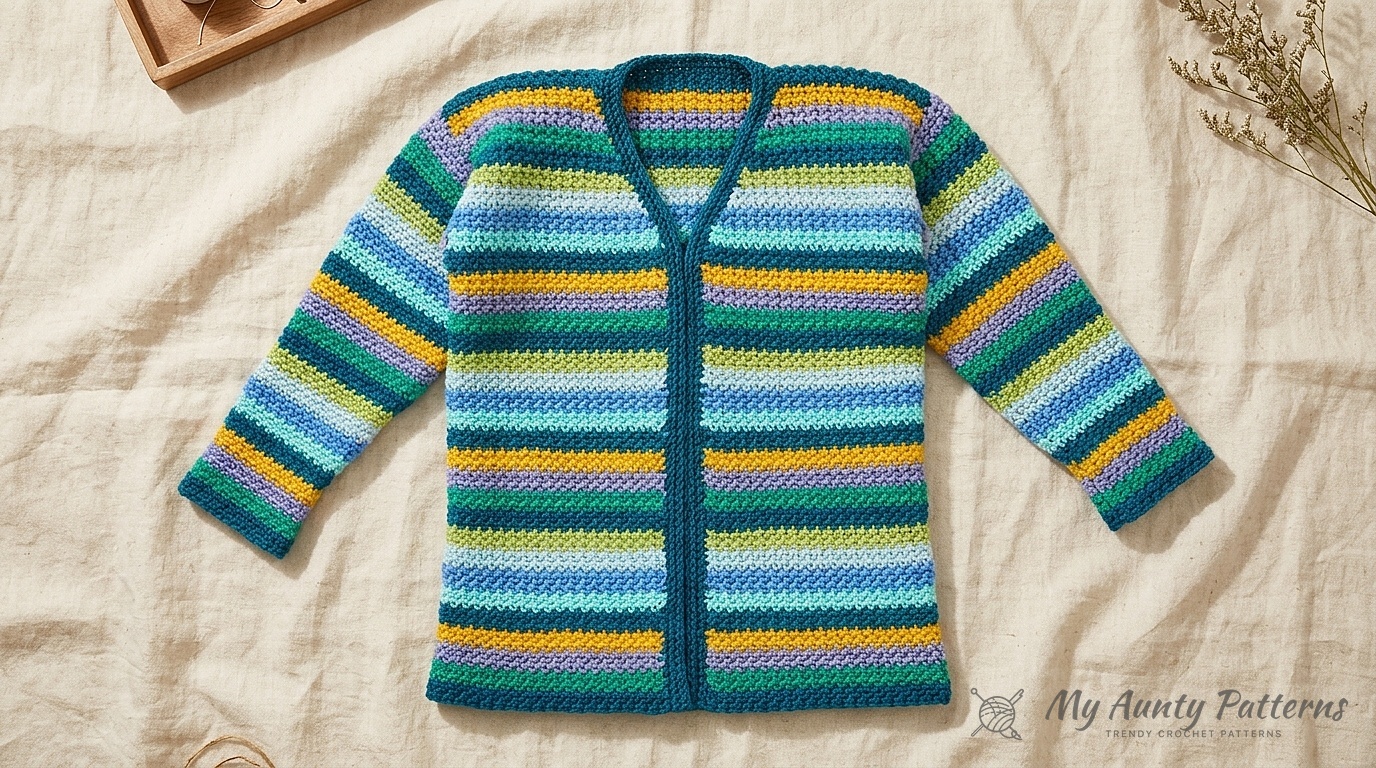
Quick Pattern Specifications
- Skill Level: Easy (One-Piece Lower Body + Even Moss Stitch Texture)
- Sizes Included: XS/S, M, L, XL, 2/3XL, and 4/5XL
- Yarn Weight: Medium Worsted (#4) — Caron® Simply Soft® (100% Acrylic; 6 oz / 170.1 g; 315 yds / 288 m per skein)
- Hook Size: Size U.S. H/8 (5.0 mm) crochet hook (or size needed to obtain gauge)
- Gauge: 15 sts and 18 rows = 4″ [10 cm] in Textured Hdc / Sl St Pattern
- Finished Chest Circumference: XS/S = 43″ (109 cm); M = 46″ (117 cm); L = 50″ (127 cm); XL = 54″ (137 cm); 2/3XL = 58″ (147.5 cm); 4/5XL = 64″ (162.5 cm)
- Finished Length: 29″ to 30½” (73.5 to 77.5 cm) depending on size
Why the Even Moss Stitch (`Hdc + Sl St`) Excels for Cardigans
Traditional double crochet sweaters can sometimes feel holey or overly stretchy, while all-single-crochet garments can feel heavy. Alternating 1 half double crochet (hdc) with 1 slip stitch (sl st)—and always working your next row’s hdc into a sl st and your sl st into an hdc—creates a dimpled, structured fabric that holds its V-neck shaping beautifully. Pro Tip: Work your slip stitches with relaxed tension so your hook slides into them effortlessly on the return row!
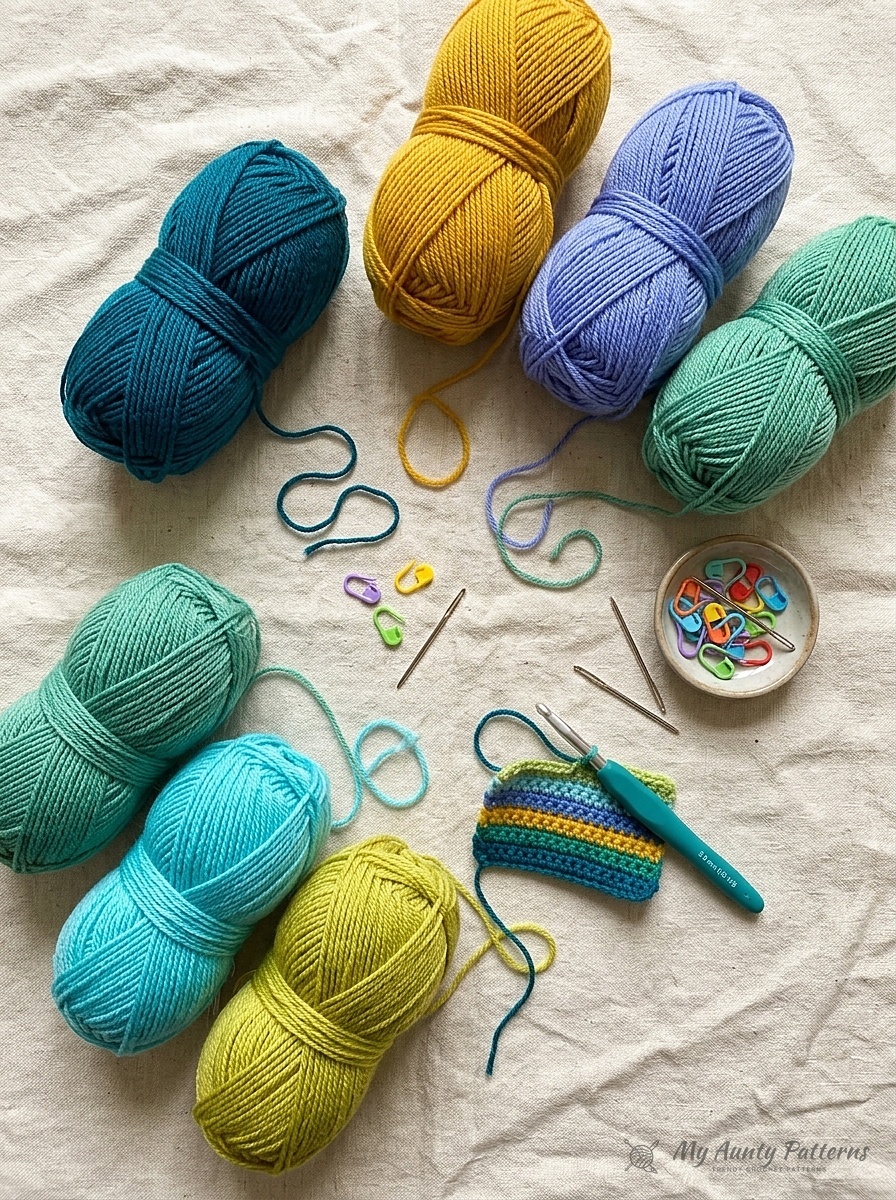
Materials & Complete Size-Inclusive Yardage Chart
This cardigan uses 9 shades of Caron® Simply Soft® (315 yds / 170.1 g per skein), or you can work the exact same 4-row stripe formula using 2, 3, or 4 favorite colors from your stash:
| Size | To Fit Chest | Finished Chest | Body Starting Chain | Contrast A (Pagoda) | Contrasts B–I (Each) |
|---|---|---|---|---|---|
| XS/S | 28–34″ (71–86.5 cm) | 43″ (109 cm) | Ch 162 (161 sts) | 2 balls | 1 ball each of B–I |
| M | 36–38″ (91.5–96.5 cm) | 46″ (117 cm) | Ch 174 (173 sts) | 2 balls | 1 ball each of B–I |
| L | 40–42″ (101.5–106.5 cm) | 50″ (127 cm) | Ch 188 (187 sts) | 2 balls | 2 balls each of B–I |
| XL | 44–46″ (112–117 cm) | 54″ (137 cm) | Ch 204 (203 sts) | 3 balls | 3 balls each of B–I |
| 2/3XL | 48–54″ (122–137 cm) | 58″ (147.5 cm) | Ch 218 (217 sts) | 3 balls | 3 balls each of B–I |
| 4/5XL | 56–62″ (142–157.5 cm) | 64″ (162.5 cm) | Ch 242 (241 sts) | 3 balls | 3 balls each of B–I |
36-Row Master Stripe Sequence: Work 4 rows each in the following order: A (Pagoda 0014) → C (Cool Green 9770) → F (Lavender Blue 9756) → I (Gold 9782) → E (Ocean 9759) → B (Robins Egg 9780) → G (Berry Blue 9609) → H (Soft Blue 9712) → D (Chartreuse 9771). These 36 rows form the repeating Stripe Pattern.
Abbreviations & Stitch Definitions (US Crochet Terms)
- Beg = Beginning
- Ch = Chain(s)
- Cont = Continue(ity)
- Hdc = Half double crochet
- Inc = Increase(d)(s)
- Pat = Pattern
- Rem = Remaining
- Rep = Repeat
- RS / WS = Right side / Wrong side
- Sc = Single crochet
- Sc2tog (Single Crochet 2 Together) = Draw up a loop in each of next 2 stitches, yoh and draw through all 3 loops on hook.
- Sl st(s) = Slip stitch(es)
- St(s) = Stitch(es)
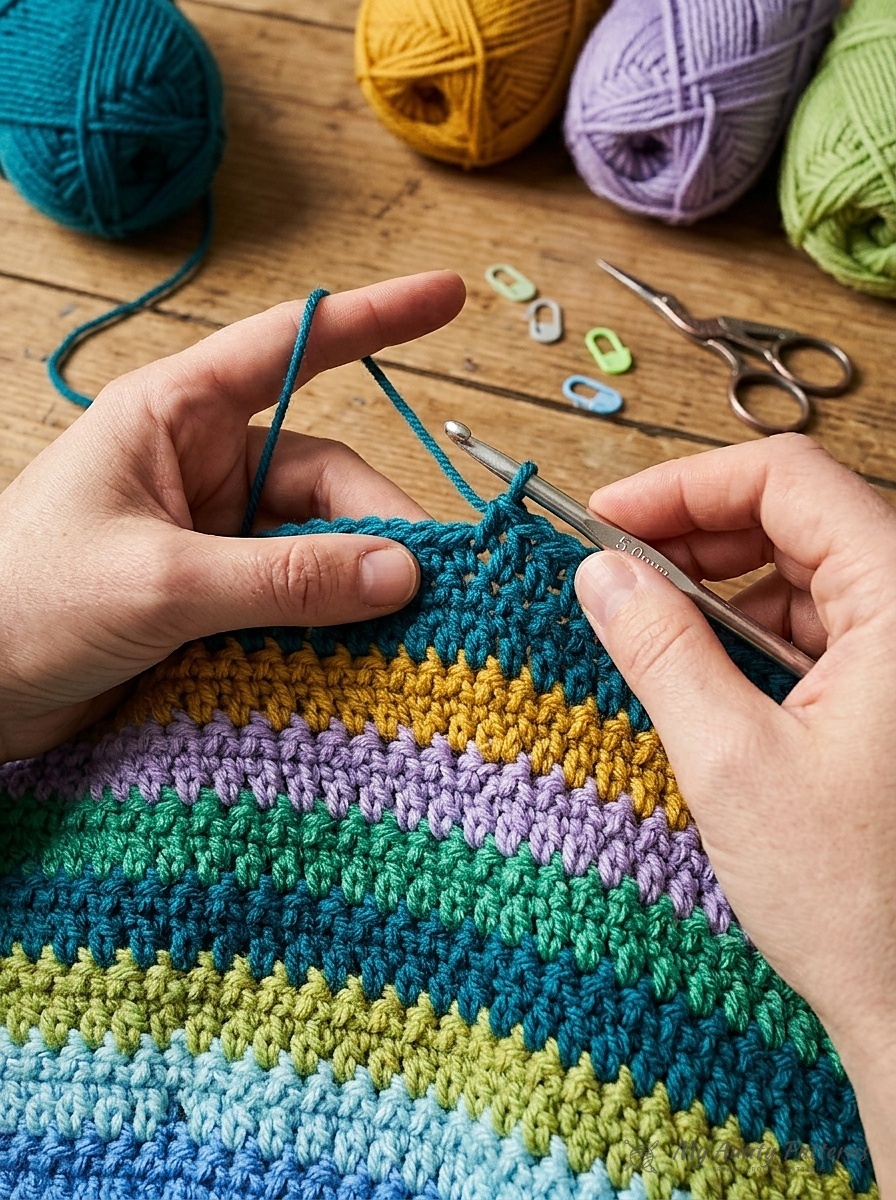
Step-by-Step Crochet Instructions
Sizes are listed as XS/S (M – L – XL – 2/3XL – 4/5XL). Note: Ch 1 or ch 2 at the beginning of a row never counts as a stitch.
Part 1: One-Piece Lower Body (Worked to Armholes)
- Foundation Chain: With Contrast A (Pagoda), ch 162 (174 – 188 – 204 – 218 – 242).
- Row 1 (RS): Work 1 sl st in 2nd ch from hook.
*Work 1 hdc in next ch. Work 1 sl st in next ch.Repeat from*to the end of the chain. Turn. (161 [173 – 187 – 203 – 217 – 241] sts) - Row 2 (WS): Ch 2 (does not count as st). Work 1 hdc in first sl st.
*Work 1 sl st in next hdc. Work 1 hdc in next sl st.Repeat from*to the end of the row. Turn. - Row 3 (RS): Ch 1. Work 1 sl st in first hdc.
*Work 1 hdc in next sl st. Work 1 sl st in next hdc.Repeat from*to the end of the row. Turn. (First 3 rows of Stripe Pat are complete.) - Continue Body to Underarms: Repeat Rows 2 and 3 for pattern while following the 36-Row Stripe Pattern (4 rows per color) until the body measures 20″ [51 cm] from the beginning, ending on a WS row.
Part 2: Dividing for Right Front, Back & Left Front
Right Front & V-Neck Shaping:
- Row 1 (RS): Work in pattern across the first 39 (43 – 45 – 47 – 51 – 55) sts. Turn and leave remaining stitches unworked.
- Row 2 (WS): Work even in pattern.
- Row 3 (RS – Neck Decrease): Ch 1. Work
sc2togover the first 2 stitches (neck edge). Work in pattern to the end of the row. Turn. - Repeat Neck Shaping: Repeat the last 2 rows 14 (16 – 12 – 11 – 14 – 14) times more. (24 [26 – 32 – 35 – 36 – 40] sts remain)
- Sizes L, XL, 2/3XL & 4/5XL Additional Shaping: Work 3 rows even in pattern (beginning on WS), then on the next RS row work
Ch 1, sc2tog, pat to end. Repeat these 4 rows (1 – 2 – 1 – 1) time(s) more to reach (30 – 32 – 34 – 38) shoulder sts. - All Sizes: Continue even in pattern until the armhole measures 9 (9½ – 9½ – 10 – 10 – 10½)” [23 (24 – 24 – 25.5 – 25.5 – 26.5) cm], ending on a WS row. Fasten off.
Upper Back Panel:
- With RS facing, skip the next 4 (4 – 4 – 8 – 8 – 12) underarm stitches from the Right Front. Rejoin the appropriate stripe color with a
sl stin the next stitch and work in pattern across 75 (79 – 89 – 93 – 99 – 107) sts (including joining st). Turn, leaving the remaining Left Front stitches unworked. - Work even in Stripe Pattern until the back armhole measures 9 (9½ – 9½ – 10 – 10 – 10½)”, ending on a WS row. Fasten off and place markers 24 (26 – 30 – 32 – 34 – 38) sts in from each side edge to mark the shoulders.
Left Front & V-Neck Shaping:
- With RS facing, skip the next 4 (4 – 4 – 8 – 8 – 12) underarm stitches after the Back. Rejoin yarn in the next stitch and work in pattern across the remaining 39 (43 – 45 – 47 – 51 – 55) sts. Turn.
- Row 2 (WS): Work even in pattern.
- Row 3 (RS – Neck Decrease): Work in pattern to the last 2 stitches at the neck edge, then work
sc2tog. Turn. - Repeat the last 2 rows 14 (16 – 12 – 11 – 14 – 14) times more (plus the 4-row repeats for L, XL, 2/3XL & 4/5XL to match the Right Front shoulder count of 24 [26 – 30 – 32 – 34 – 38] sts). Continue even until the armhole measures 9 (9½ – 9½ – 10 – 10 – 10½)”, ending on a WS row. Fasten off.
Part 3: Tapered Striped Sleeves (Make 2)
- With Contrast A, ch 42 (44 – 44 – 48 – 48 – 52). Work Rows 1–3 of the Textured Stripe Pattern across 41 (43 – 43 – 47 – 47 – 51) sts, then continue in Stripe Pattern until the sleeve measures 4″ [10 cm] from the cuff, ending on a WS row.
- Sleeve Increases: Following the 8-row sleeve increase cycle (increasing 1 stitch at each side on Row 1 via
(1 hdc, sl st)in first/last hdc and on Row 5 via(sl st, 1 hdc)in first/last sl st), repeat the 8-row cycle 5 (6 – 6 – 6 – 6 – 6) times more (plus Rows 1–4 once more for size XS/S) until you have 67 (71 – 71 – 75 – 75 – 79) sts. - Work even until the sleeve measures 18 (18 – 18 – 17 – 17 – 16)”, ending on a WS row. Place markers at both ends of the last row, then work 2 (2 – 2 – 4 – 4 – 6) more rows even for the underarm extensions. Fasten off.
Part 4: Seaming & Ribbed Pagoda Front Band
- Assembly: Sew both shoulder seams to the Back shoulder markers. Sew the sleeve seams up to the sleeve markers, then sew the sleeves into the armholes, aligning the rows above the sleeve markers along the skipped underarm stitches of the Body to create neat square armholes.
- Row 1 (RS – Front Edging): Join Contrast A (Pagoda) with a
sl stat the bottom corner of the Right Front. Ch 1 and work 1 row of single crochet (sc) evenly up the Right Front, across the back neck, and down the Left Front. Turn. - Rows 2–5 (Ribbed Collar Band): Ch 1. Working in back loops only (BLO), work 1 sc in each sc to the end of the row. Turn. Fasten off after Row 5 and weave in all ends.
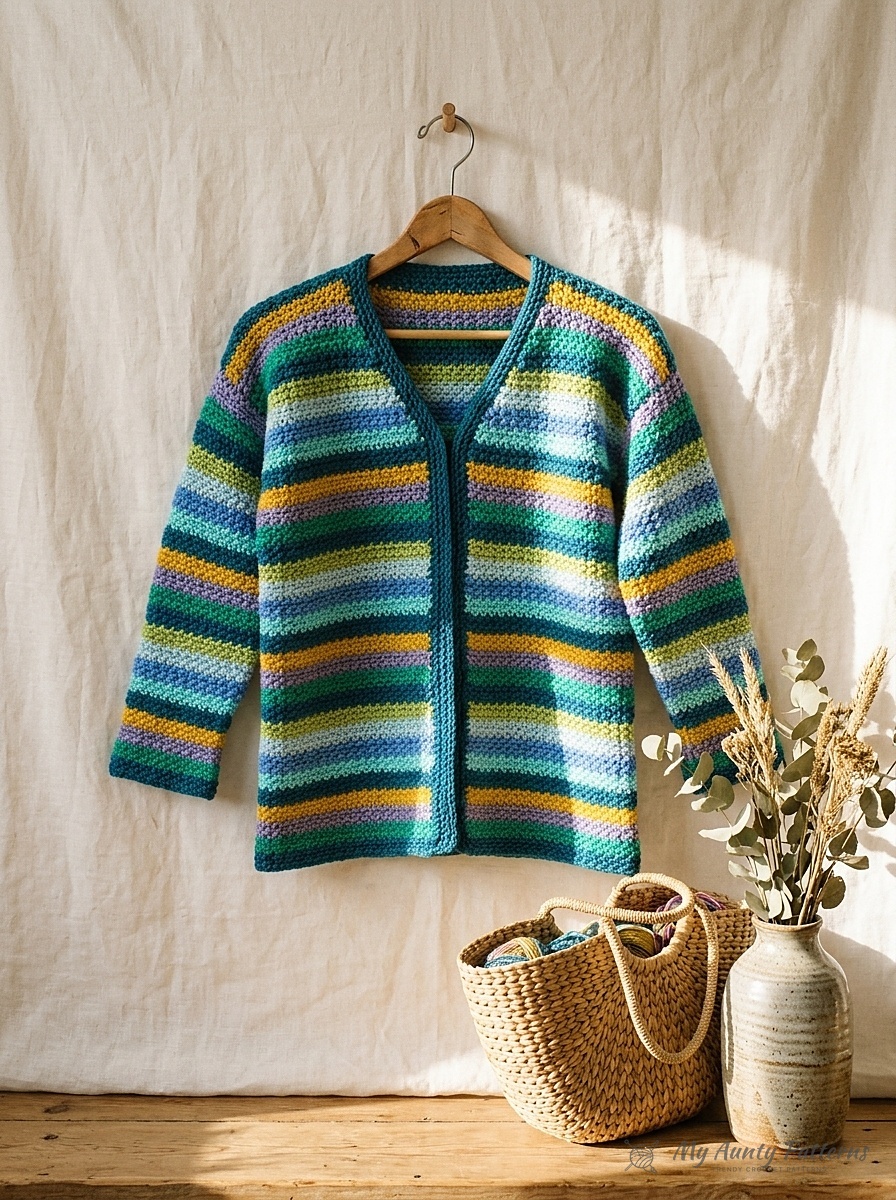
Save & Print This Crochet Pattern
Prefer working offline or keeping a printed copy in your project bag? Download our formatted Textured Stripes Crochet Cardigan printable PDF guide below, complete with the full materials table, stitch diagrams, color-key charts, and step-by-step assembly instructions prepared for My Aunty Patterns.
READER COMMENTS & PATTERN QUESTIONS
Have a question about stitch counts, yarn substitutions, or sizing? Leave a comment below — Mary Ward reads and replies to every maker question!