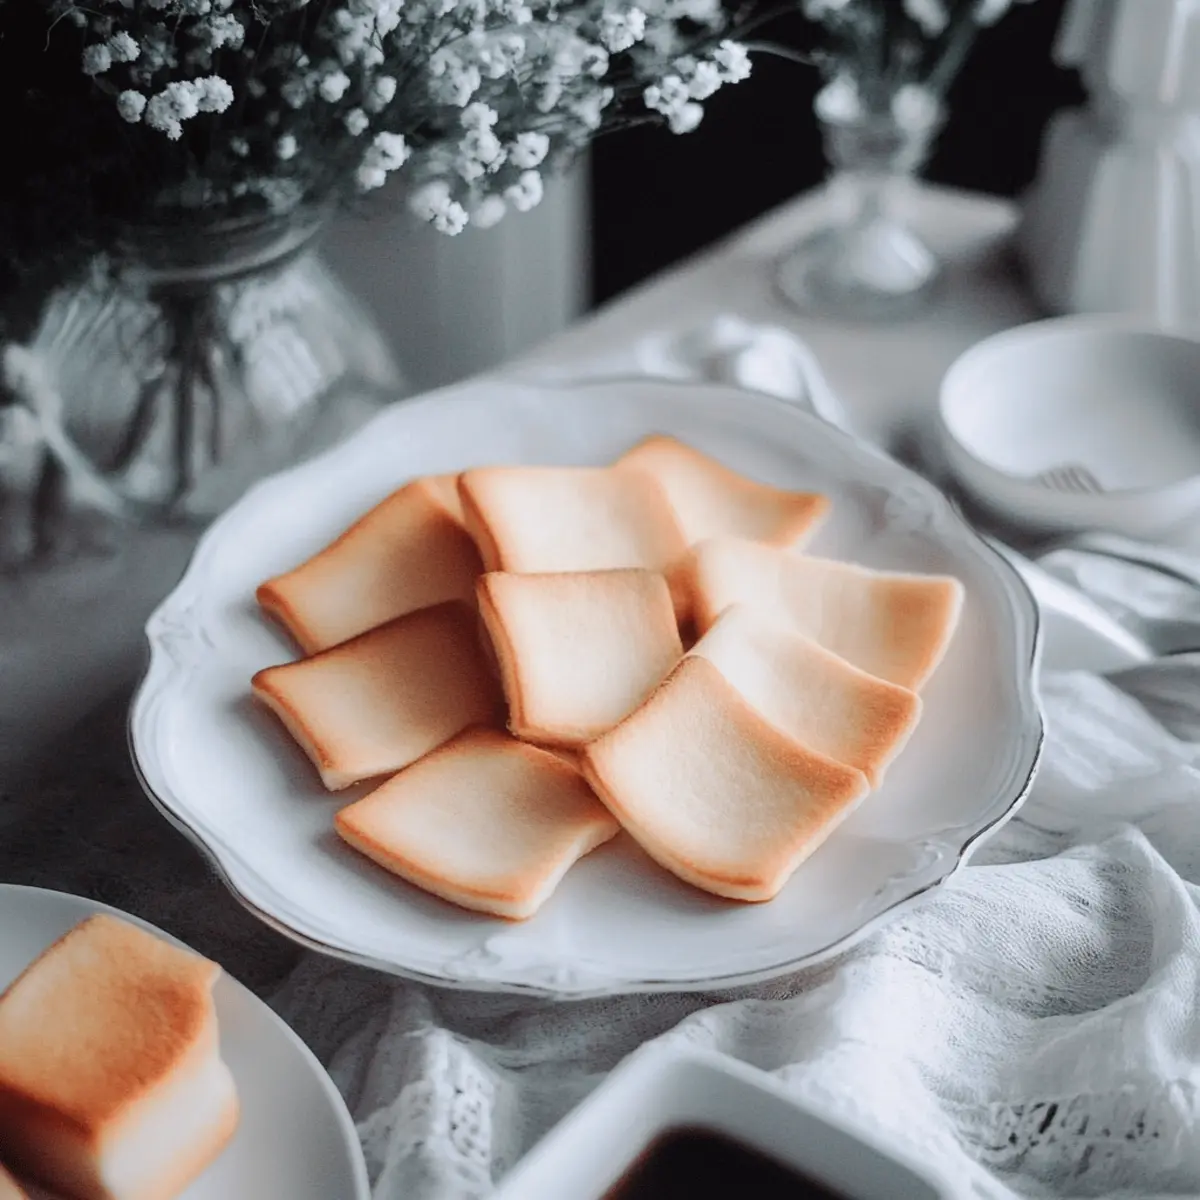
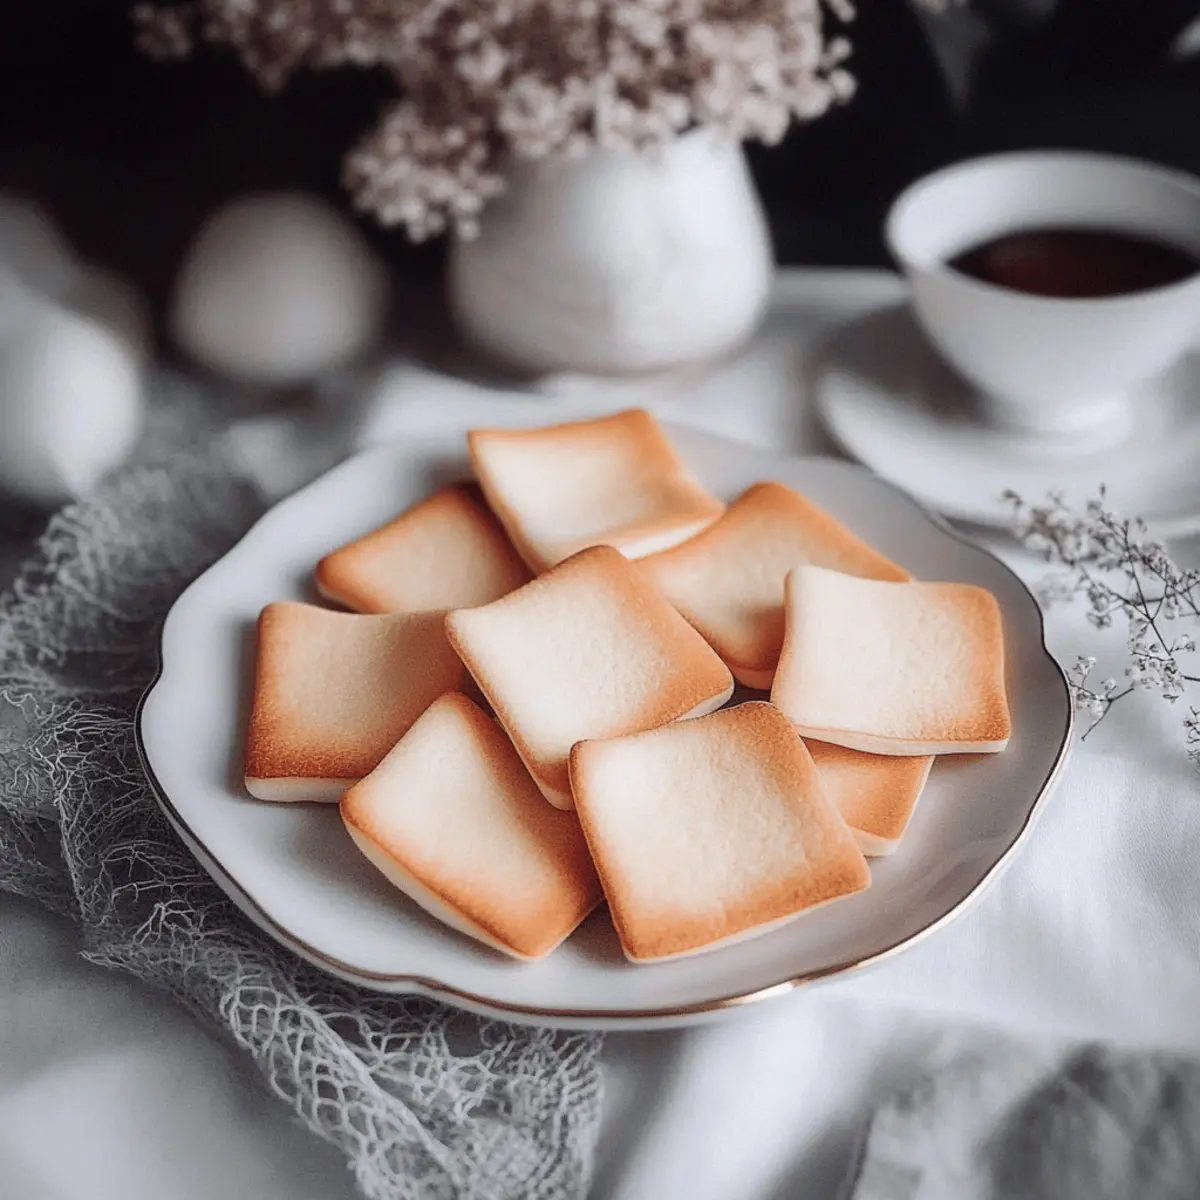
When it comes to irresistible treats, few can claim the charm of Shiroi Koibito biscuits. These delicate, melt-in-your-mouth Japanese sweets are not just biscuits; they represent the perfect combination of a crispy shell with a rich, gooey chocolate center that tantalizes your taste buds. Each bite is a blissful experience that transports you to a quaint patisserie in Sapporo, where these biscuits originated.
Picture this: You’re in a cozy café, the smell of fresh coffee and baked goods dancing through the air, as you take a bite of a warm biscuit. Suddenly, the buttery crunch gives way to a luscious layer of chocolate, and you can’t help but smile as the sweetness envelops you. Perfect with tea, coffee, or as an indulgent snack after a long day, these biscuits are a must-try.
Why You'll Love This Shiroi Koibito
- This incredible Shiroi Koibito transforms simple everyday ingredients into restaurant-quality flavors that will blow your mind completely.
- Foolproof recipe techniques guarantee perfect results every single time, making even novice cooks feel like professional chefs instantly.
- Stunning visual appeal with gorgeous colors and mouthwatering aromas creates the ultimate Instagram-worthy dish for any special occasion.
- Endlessly adaptable for different dietary needs while working beautifully for meal prep, date nights, or entertaining large groups effortlessly.
Ingredients for Shiroi Koibito
Here’s what you’ll need to make this delicious Shiroi Koibito:
50 g softened butter – Use unsalted butter for the perfect blend of sweetness and richness.
50 g icing sugar – This finely powdered sugar adds a delicate sweetness without the gritty texture.
50 g flour – All-purpose flour works best for a light and airy texture in your biscuits.
1 egg white – The egg white helps bind the ingredients together, giving the biscuits their lovely structure.
100 g chocolate of choice for the filling – Choose high-quality chocolate for a rich, decadent filling that enhances the biscuit experience.
How to Make Shiroi Koibito
Follow these simple steps to prepare this delicious Shiroi Koibito:
Step 1: Prepare Your Kitchen
Preheat your oven to 180 degrees C (350 degrees F) and line a baking tray with parchment paper. This ensures your biscuits won’t stick and makes cleanup a breeze.
Step 2: Cream the Butter and Sugar
In a mixing bowl, beat the softened butter until it’s creamy. Gradually add in the icing sugar and mix until well blended. This should take about a minute. The goal here is to create a light, fluffy mixture.
Step 3: Mix in the Flour and Egg White
Now add the egg white and flour to the bowl. Mix everything together until you get a smooth and homogenous batter. This is the foundation of your Shiroi Koibito that will hold together beautifully!
Step 4: Shape the Biscuits
Using a square chablon stencil placed on your lined baking tray, spread the batter evenly. Use a dough scraper to press down and remove excess dough. Lift the stencil off to reveal perfectly shaped biscuit squares!
Step 5: Bake the Biscuits
Place your baking tray in the preheated oven and bake for approximately 10 minutes. Keep an eye on them as you want the edges to turn a light golden shade—this step is critical for that perfect crunch!
Step 6: Prepare the Chocolate Filling
While the biscuits are baking, melt the chocolate in a microwave-safe bowl, heating in 30-second intervals. Stir it between each interval until you achieve a smooth and liquid-like consistency.
Step 7: Assemble Your Treats
Once the chocolate is melted, pour it onto the square chablon stencil on another lined baking tray. Use the dough scraper to spread it evenly. Chill this in the fridge for about 30 minutes to set.
Step 8: Final Assembly
Remove the chilled chocolate squares from the stencil. Sandwich each chocolate square between two biscuits, using a bit of melted chocolate as glue to hold everything together. Voilà! You’ve now created your own Shiroi Koibito biscuits.
Serve these delightful treats with your favorite beverage for an utterly charming experience. Whether it’s for a special occasion or a simple snack, these biscuits are sure to impress. Enjoy the sweet satisfaction of having recreated a beloved Japanese classic right in your kitchen!
You Must Know About Shiroi Koibito
- This showstopping Shiroi Koibito delivers restaurant-quality results using simple ingredients you probably already have at home.
- The perfect balance of textures and flavors creates an unforgettable dining experience that will have everyone asking for seconds.
- Picture-perfect presentation with vibrant colors makes this dish absolutely Instagram-worthy and guaranteed to impress any dinner guest.
- Incredibly versatile recipe that works beautifully for weeknight dinners, meal prep, special occasions, or even outdoor entertaining sessions.
Perfecting Shiroi Koibito Cooking Process
Start by preheating your oven while you mix the butter, icing sugar, egg white, and flour. Bake the biscuits first, allowing them to cool before pouring on the melted chocolate filling for the perfect layered effect.
Add Your Touch to Shiroi Koibito
Feel free to customize your Shiroi Koibito biscuits! Swap out the chocolate for your favorite filling, such as caramel or fruit preserves. You can also experiment with a hint of vanilla or almond extract for added flavor.
Storing & Reheating Shiroi Koibito
To store your Shiroi Koibito biscuits, keep them in an airtight container at room temperature for up to a week. If you need to reheat, pop them in a warm oven for a few minutes to restore their delightful texture.
Chef's Helpful Tips for Shiroi Koibito
- This professional-quality Shiroi Koibito relies on precise timing and temperature control to achieve restaurant-standard results consistently.
- Master the art of mise en place by prepping all ingredients beforehand, ensuring smooth execution and preventing any last-minute cooking disasters.
- The secret lies in layering flavors throughout the cooking process rather than seasoning only at the end for maximum depth.
- Pro tip: let the finished dish rest for optimal texture and flavor development before serving to hungry guests waiting eagerly.
The first time I made Shiroi Koibito, my friends were so impressed that they nearly devoured them before I could even snap a picture!
FAQs About Shiroi Koibito
What is Shiroi Koibito?
Shiroi Koibito is a beloved Japanese treat that beautifully combines crispy biscuits with a rich chocolate filling. Originating from Hokkaido, these delightful snacks are often considered a must-try when visiting Japan. The biscuits, known as “langue de chat,” have a pleasing crunch that perfectly contrasts the smooth and creamy chocolate center. Often enjoyed with a cup of tea or coffee, they make for a delightful dessert or a sweet snack during any time of the day.
How do I store my Shiroi Koibito?
To keep your Shiroi Koibito in top condition, store them in an airtight container at room temperature. This will help maintain their delightful crispness and prevent them from becoming stale. They can last up to a week, though I doubt they’ll last that long! For longer storage, consider freezing them. Just ensure each biscuit is well-wrapped to avoid freezer burn, then enjoy them slightly warmed for the best texture and taste.
Can I customize my Shiroi Koibito fillings?
Absolutely! One of the joys of making Shiroi Koibito is that you can personalize the fillings to suit your taste. While traditional recipes use chocolate, you can experiment with other flavors like caramel, fruit jams, or even nut spreads. For an exciting twist, try adding a splash of almond or vanilla extract to the batter. Your creativity can result in unique variations that keep everyone guessing!
What occasion is best for serving Shiroi Koibito?
Shiroi Koibito biscuits are incredibly versatile and suitable for all occasions. Whether you’re hosting a tea party, a picnic, or a formal dinner, these charming biscuits will surely impress your guests. Additionally, they make excellent gifts, beautifully packaged in a decorative box. During the holidays, they can even serve as a delightful treat for friends and family, making them an instant favorite at any gathering.
Conclusion for Shiroi Koibito
In conclusion, Shiroi Koibito biscuits offer a delightful combination of crispy texture and rich chocolate flavor that can elevate any dessert table. With simple ingredients and the flexibility to customize fillings, this recipe is a fantastic addition to any home chef’s repertoire. From casual snacking to elegant gifting, Shiroi Koibito adds an exquisite touch to any occasion. So gather your ingredients and get ready to impress with this irresistible Japanese treat!

Delicious Shiroi Koibito Biscuits Recipe: Sweet Japanese Treats
Ingredients
Equipment
Method
- Preheat your oven to 180 degrees C.
- Using a mixer, beat the butter until soft, gradually adding the icing sugar, egg white, and flour until smooth.
- Spread the batter onto a square chablon stencil on a lined baking tray and use a dough scraper to remove excess dough, revealing uniform squares.
- Bake the biscuits for 10 minutes until the edges turn slightly golden.
- Melt the chocolate in the microwave in 30-second intervals until liquid.
- Pour the melted chocolate into the chablon stencil on the lined tray, level it out with the dough scraper, and refrigerate for 30 minutes.
- Once chilled, remove the chocolate squares from the stencil and assemble them on the biscuits with a bit of melted chocolate.