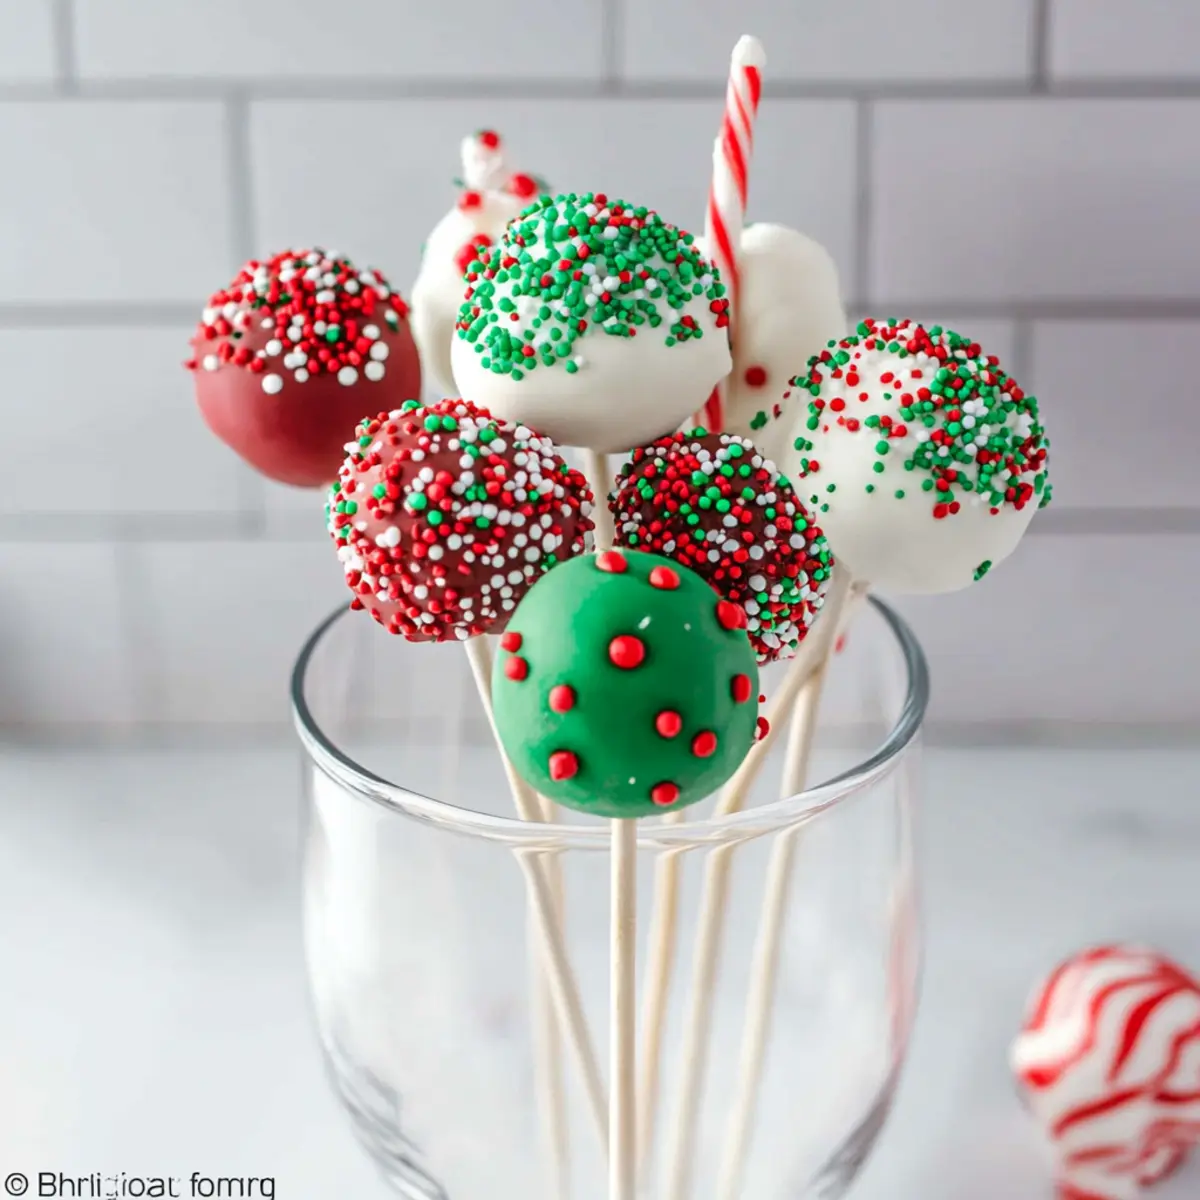
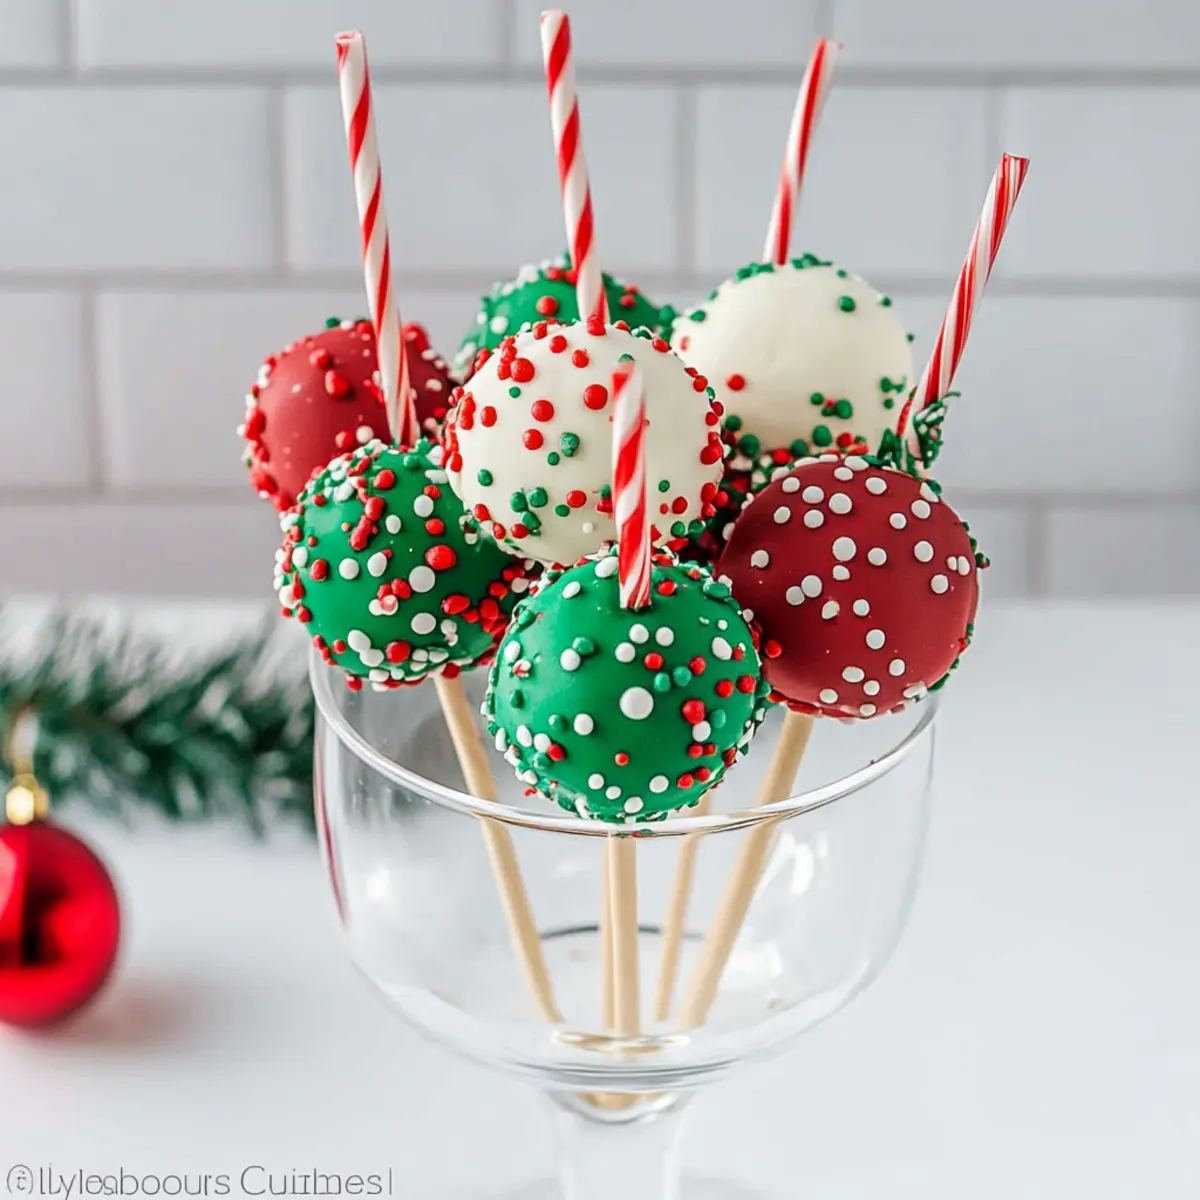
There’s something magical about the holiday season, especially when it comes to sharing delights like Festive Christmas Cake Pops. These little orbs of sweetness are brimming with the kind of nostalgic flavors that remind us of cozy family gatherings and the joy of giving. With their perfectly sweet coating and vibrant colors, they are as delightful to look at as they are to eat.
Imagine a bite-sized treat that bursts with a rich, buttery flavor and a creamy frosting surprise in the center. They’re adorable, they’re tasty, and they add that festive sparkle to any holiday celebration. Plus, they’re the perfect way to get your friends and family into the holiday spirit while satisfying that sweet tooth. What’s not to love about these festive delights?
Why You'll Love This Festive Christmas Cake Pops
- This incredible Festive Christmas Cake Pops transforms simple everyday ingredients into restaurant-quality flavors that will blow your mind completely.
- Foolproof recipe techniques guarantee perfect results every single time, making even novice cooks feel like professional chefs instantly.
- Stunning visual appeal with gorgeous colors and mouthwatering aromas creates the ultimate Instagram-worthy dish for any special occasion.
- Endlessly adaptable for different dietary needs while working beautifully for meal prep, date nights, or entertaining large groups effortlessly.
Ingredients for Festive Christmas Cake Pops
Here’s what you’ll need to make this delicious Festive Christmas Cake Pops:
1 box 16.5 oz Super Moist Yellow Cake Mix – The base for these cake pops; choose a high-quality mix for best results.
Plus ingredients to prepare the cake on the back of the box – Don’t forget the eggs, oil, and water specified in the mix instructions.
1/3 cup Cream Cheese Frosting – Adds a rich and tangy sweetness that balances the cake flavor beautifully.
8 oz. White Candy Melts – This will be your go-to color for snowy, festive pops; choose a brand that melts smoothly.
8 oz. Red Candy Melts – For that cheerful pop of Christmas red; perfect for coating or creating decorative drizzles.
8 oz. Green Candy Melts – A touch of Christmas greenery to your cake pops; also great for design accents.
Christmas Sprinkles – These bring the fun! Grab a variety to make each pop uniquely festive.
Lollipop Sticks – Essential for the cake pop experience; choose sturdy ones to hold these delicious treats.
How to Make Festive Christmas Cake Pops
Follow these simple steps to prepare this delicious Festive Christmas Cake Pops:
Step 1: Bake the Cake
Prepare the cake mix according to the package instructions, baking it in a 9X13 pan. Let the cake cool completely once it’s out of the oven.
Step 2: Crumble the Cake
Remove the cooled cake from the pan and discard the hard crust. Crumble the soft cake into a large bowl until no large lumps remain.
Step 3: Add the Frosting
Pour the cream cheese frosting over the crumbled cake. Stir the mixture vigorously until it’s well combined and resembles a doughy consistency.
Step 4: Form the Cake Balls
Using your hands, shape the cake mixture into small balls, about 1 inch in diameter. Place them on a lined cookie sheet, making sure they’re spaced apart.
Step 5: Stick It In
Gently insert a lollipop stick into each cake ball, pushing it in about halfway. Afterward, freeze the cake pops for 10-15 minutes to firm them up.
Step 6: Melt the Chocolate
While the cake pops chill, melt the candy melts in separate microwave-safe bowls. Heat in 30-second intervals, stirring in between until smooth and creamy.
Step 7: Coat the Cake Pops
Dip each cake pop into your chosen candy melt, making sure to cover it completely. Allow any excess candy to drip back into the bowl.
Step 8: Sprinkle Some Joy
Immediately after coating, sprinkle your favorite Christmas sprinkles on top of the wet chocolate. The sprinkles will adhere best while the candy coating is still soft.
Step 9: Set and Serve
Stand the cake pops upright in a block of styrofoam or a cake pop holder to let them set completely. Once dry, your pops are ready to slice, present, and enjoy!
These Festive Christmas Cake Pops are perfect for holiday parties, gift-giving, or cozy nights in with family. Their cute size makes them a hit among kids and adults alike, making every occasion a little more special. Whether you’re sitting around the tree, at a festive gathering, or simply celebrating life, these delightful little bites will surely bring smiles and joyous flavors to your celebrations. So grab your ingredients, and let’s dive into holiday cheer together!
This showstopping Festive Christmas Cake Pops delivers restaurant-quality results using simple ingredients you probably already have at home. The perfect balance of textures and flavors creates an unforgettable dining experience that will have everyone asking for seconds. Picture-perfect presentation with vibrant colors makes this dish absolutely Instagram-worthy and guaranteed to impress any dinner guest. Incredibly versatile recipe that works beautifully for weeknight dinners, meal prep, special occasions, or even outdoor entertaining sessions.
Perfecting Festive Christmas Cake Pops Cooking Process
Start by baking the cake in a 9×13 pan according to the package instructions. Once cooled, crumble the cake into fine pieces and mix in the frosting for the perfect consistency. Form into balls before freezing to ensure they hold their shape during dipping.
Add Your Touch to Festive Christmas Cake Pops
Get creative by adding flavored extracts like peppermint or almond to the frosting mix for that extra festive twist. Feel free to swap the yellow cake mix with chocolate or even gluten-free options to cater to dietary preferences while keeping it delicious.
Storing & Reheating Festive Christmas Cake Pops
Store your Festive Christmas Cake Pops in an airtight container at room temperature for up to three days. If you want to keep them longer, they can be frozen for up to a month. To reheat, leave them at room temperature for a few minutes before serving.
Chef's Helpful Tips for Festive Christmas Cake Pops
- This professional-quality Festive Christmas Cake Pops relies on precise timing and temperature control to achieve restaurant-standard results consistently.
- Master the art of mise en place by prepping all ingredients beforehand, ensuring smooth execution and preventing any last-minute cooking disasters.
- The secret lies in layering flavors throughout the cooking process rather than seasoning only at the end for maximum depth.
- Pro tip: let the finished dish rest for optimal texture and flavor development before serving to hungry guests waiting eagerly.
One memorable Christmas, I made these Festive Christmas Cake Pops for a family gathering. Watching my niece’s eyes light up as she took her first bite was priceless and filled my heart with the joy of holiday cooking.
FAQs About Festive Christmas Cake Pops
What is Festive Christmas Cake Pops?
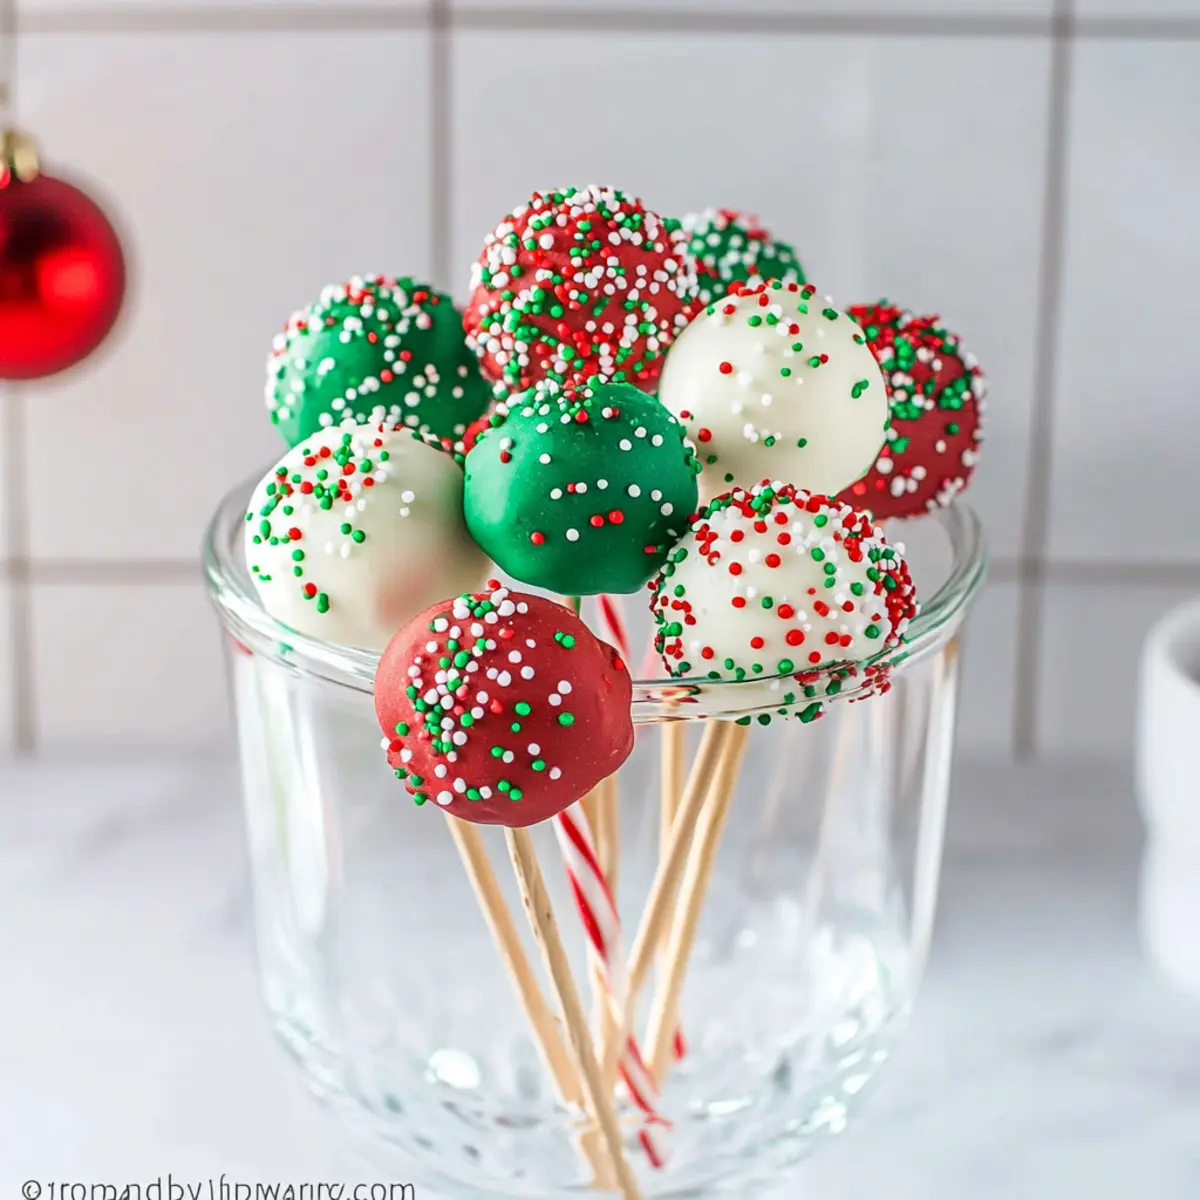
Festive Christmas Cake Pops are delightful little treats made by crumbling cake, mixing it with frosting, and forming it into balls that are then coated in colorful melted candy. These bite-sized desserts are not only delicious but also perfect for holiday celebrations. With their vibrant colors and fun decorations, they add a beautiful touch to any festive gathering. The combination of flavors and textures makes them a favorite at Christmas parties, ensuring everyone will want to grab one (or two) off the table.
How do I store my Festive Christmas Cake Pops?
To maintain freshness, store your Festive Christmas Cake Pops in an airtight container at room temperature for up to three days. If you wish to extend their shelf life, you can freeze them for up to a month. Just make sure they’re well-wrapped to prevent freezer burn. When you’re ready to enjoy them again, let them sit at room temperature for a few minutes to regain their soft and chewy texture, making them as delightful as the day you made them.
Can I customize my Festive Christmas Cake Pops?
Absolutely! One of the best aspects of making Festive Christmas Cake Pops is their versatility. You can customize them by adding various flavors to the frosting, such as peppermint or hazelnut, to enhance their holiday appeal. Additionally, feel free to swap the yellow cake mix for chocolate or gluten-free options, ensuring there’s something for everyone. You can also choose different colored candy melts to match your holiday themes and spruce them up with various sprinkles.
How long does it take to prepare Festive Christmas Cake Pops?
Preparing Festive Christmas Cake Pops is fairly quick and fun! From start to finish, you’ll need roughly 55 minutes, which includes baking the cake and shaping the pops. The actual hands-on preparation takes about 15 minutes, while the rest goes to baking and allowing the pops to cool. These delightful treats make a great addition to any holiday spread and can easily be made ahead of time, allowing you to enjoy quality time with your loved ones.
Conclusion for Festive Christmas Cake Pops
Creating Festive Christmas Cake Pops is a joyful and creative experience that brings family and friends together. These vibrant treats are easy to make, customizable, and perfect for any holiday celebration. With their festive colors and delectable taste, they are sure to impress your guests and become a holiday staple in your household. So gather your ingredients, roll up your sleeves, and let the spirit of the season shine through your delicious Festive Christmas Cake Pops!
Delicious Festive Christmas Cake Pops Recipe for Holiday Celebrations
Ingredients
Equipment
Method
- Make cake and bake according to box instructions in a 9X13 pan. Let the cake cool at room temperature.
- Remove the cake from the pan. Remove the brown outside layer from the cake and discard. Crumble the remaining cake into a large bowl.
- Add the frosting to the crumbled cake and stir until well combined.
- Shape the mixture into about 24-36 cake balls (depending on their size) and place on a lined cookie sheet.
- Gently place each cake pop stick into the cake balls about halfway in. Place in the freezer for 10-15 minutes.
- Place each of the candy melts in a separate microwave safe bowl. Heat in 30 second intervals, stirring after each interval until fully melted.
- Dip each cake pop into one color of the melted candy melts, ensuring the candy covers the cake pop completely. Allow excess melted candy to drip off back into the bowl.
- Place the stick of cake pops in a block of styrofoam. Top the cake pops with sprinkles before the candy coating dries.
- Continue until all cake pops are covered. Once all cake pops are dry, they are ready to serve and enjoy.