Imagine biting into a warm, gooey chocolate chip cookie fresh out of the oven, its rich aroma wrapping around you like a cozy blanket on a chilly night. The moment the sweet, melted chocolate hits your tongue, it’s pure bliss—a delightful explosion of flavors that transports you back to carefree childhood days filled with laughter and shared treats.
Every time I whip up this nostalgic recipe, I’m reminded of family gatherings where the kitchen buzzed with excitement and the air was thick with mouthwatering scents. Whether it’s a rainy afternoon or a festive celebration, these cookies promise to bring joy and comfort, making every moment deliciously memorable and utterly irresistible.
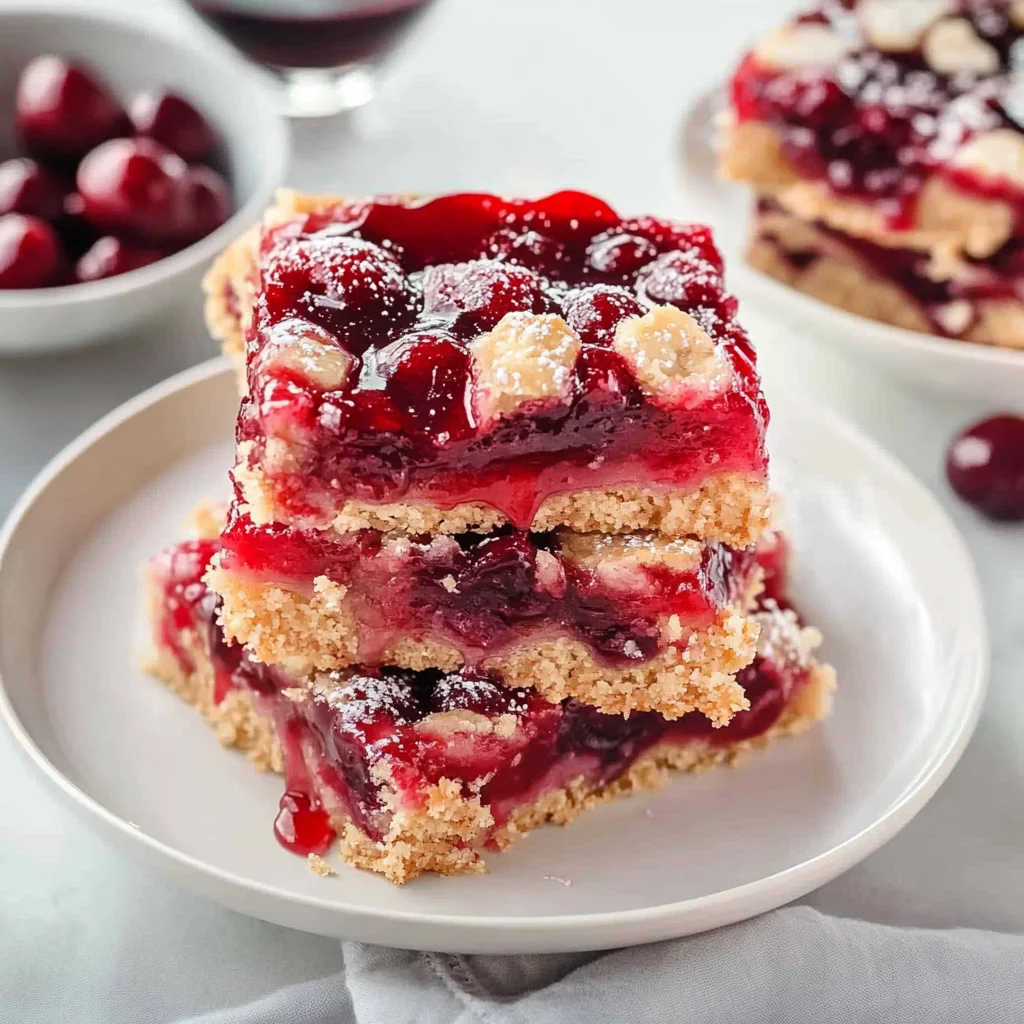
Why will you adore Cherry Pie Bars?
Irresistible flavor: Each bite bursts with sweet, tangy cherry goodness that’ll keep you coming back for more.
Super easy: With just a few simple ingredients and minimal prep time, these bars are a breeze to whip up!
Versatile treat: Perfect for parties, picnics, or a cozy night in, they suit any occasion effortlessly.
Crowd-pleaser: Whether at a family gathering or a bake sale, these bars are sure to impress everyone around!
Cherry Pie Bars Ingredients
For the Crust
- All-purpose flour – a versatile base that gives your crust that perfect flaky texture.
- Granulated sugar – sweetens the crust just enough to enhance the cherry flavor.
- Salt – balances sweetness and boosts overall flavor.
- Unsalted butter – for a rich, buttery taste; make sure it’s chilled for the best results.
- Egg yolk – adds richness and helps bind the crust together.
For the Cherry Filling
- Fresh or frozen cherries – use whichever is available; both deliver that delightful tartness.
- Granulated sugar – sweetens the filling; adjust according to your cherry’s natural sweetness.
- Cornstarch – thickens the filling, ensuring it doesn’t turn watery as it bakes.
- Lemon juice – brightens up the cherry flavor, making these Cherry Pie Bars unforgettable!
For the Topping
- Oats – add a lovely texture and heartiness to your topping.
- Brown sugar – brings a deeper caramel note that pairs beautifully with cherries.
- Cinnamon – adds warmth and depth, enhancing the overall flavor of your pie bars.
- Melted butter – holds everything together and adds richness to your crumbly topping.
How to Make Cherry Pie Bars
1. Preheat the oven: Set your oven to 350°F (175°C) so it’s perfectly warmed for baking. A well-preheated oven ensures those Cherry Pie Bars bake evenly and turn out just right.
2. Prepare the pan: Grease a 9×13-inch baking dish with butter or non-stick spray. This will help your bars lift out easily, leaving no delicious crumb behind!
3. Mix the crust: In a large bowl, combine flour, sugar, and cold butter until crumbly. Use your fingers or a pastry cutter for that perfect texture—think of sandy beach vibes!
4. Press into the pan: Firmly press two-thirds of the crumb mixture into the bottom of your prepared baking dish. Aim for an even layer that’s about ½ inch thick; this forms the delightful base for your Cherry Pie Bars.
5. Add cherry filling: Spread your favorite cherry pie filling over the crust, ensuring it reaches every corner. The vibrant red color adds a gorgeous pop that’s hard to resist!
6. Top with remaining crust: Crumble the remaining one-third of the crust mixture over the cherry filling. It should look like a delicate snow covering—this will create a lovely texture once baked.
7. Bake to perfection: Place in your preheated oven and bake for 30-35 minutes, or until golden brown on top. You’ll know it’s ready when the aroma fills your kitchen with sweet anticipation.
8. Cool completely: Once baked, let the bars cool in the pan on a wire rack for at least an hour before slicing. This helps them set up nicely—trust me, patience is key here!
Optional: Drizzle with vanilla glaze for an extra touch of sweetness.
Exact quantities are listed in the recipe card below.
Tips for the Best Cherry Pie Bars
- Use Fresh Cherries: Opt for ripe, fresh cherries when possible. Their natural sweetness enhances the flavor of your cherry pie bars beautifully.
- Don’t Overmix: When making the crust, mix just until combined. Overmixing can lead to tough bars; we want them tender and flaky!
- Even Baking: Ensure your baking dish is evenly greased and the batter spread is level. This promotes uniform cooking and prevents burnt edges on your cherry pie bars.
- Cool Completely: Allow the bars to cool completely before slicing. This helps them set up nicely and prevents messy servings.
- Zest for Flavor: Adding a bit of lemon zest to your filling brightens the flavor profile, balancing the sweetness of the cherries in your pie bars.
How to Store and Freeze Cherry Pie Bars

- Room Temperature: Keep cherry pie bars in an airtight container at room temperature for up to 3 days to maintain their deliciousness and freshness.
- Fridge: For longer freshness, store the bars in the fridge for up to a week. Just make sure they’re covered to prevent any drying out!
- Freezer: You can freeze cherry pie bars for up to 3 months. Wrap them tightly in plastic wrap, then place them in a freezer-safe container for best results.
- Reheating: To enjoy your cherry pie bars warm, simply reheat in the oven at 350°F (175°C) for about 10 minutes or until warmed through.
Cherry Pie Bars Variations Galore
Feel free to explore these delightful twists and substitutions to make this recipe your own!
- Gluten-Free: Swap regular flour for a gluten-free blend to keep everyone happy without sacrificing flavor. Your loved ones won’t even notice the difference!
- Vegan: Use coconut oil or vegan butter along with flaxseed meal instead of eggs. Enjoy the same delicious taste while keeping it plant-based.
- Almond Extract: Add a teaspoon of almond extract for a nutty twist that enhances the cherry flavor beautifully. It’s a small change that makes a big impact!
- Chocolate Drizzle: Melt dark chocolate and drizzle over cooled bars for an indulgent touch. This sweet addition pairs wonderfully with tart cherries!
- Coconut Topping: Sprinkle shredded coconut on top before baking for added texture and a hint of tropical flair. It’s like a mini-vacation in every bite!
- Spicy Kick: Add a pinch of cayenne pepper or red pepper flakes to the filling for an unexpected warmth. This twist will surprise and delight adventurous palates.
- Mixed Berries: Combine cherries with raspberries or blueberries for a burst of mixed berry goodness. Each bite will be a medley of flavors, perfect for summer gatherings.
- Nutty Crust: Incorporate crushed nuts into your crust for extra crunch and richness. A little bit of texture elevates the whole experience!
Make Ahead Options
Cherry Pie Bars are the perfect treat for meal prep, allowing you to savor their delightful flavors without the last-minute rush. To get a head start, you can prepare the crust and filling up to 24 hours in advance. Simply mix together 2 cups of all-purpose flour, 1 cup of unsalted butter, and ½ cup of sugar for the crust, then press it into your baking dish. For the cherry filling, pit and slice 4 cups of fresh or frozen cherries and mix with ¾ cup of sugar and 2 tablespoons of cornstarch. Store both components in airtight containers in the refrigerator. When you’re ready to bake, just assemble your Cherry Pie Bars by layering the filling over the crust and baking at 350°F for about 30-35 minutes. This way, you’ll enjoy fresh-baked bars that taste just like they came straight from Grandma’s kitchen!
Cherry Pie Bars Recipe FAQs
What type of cherries should I use for Cherry Pie Bars?
For the best flavor, opt for fresh, ripe cherries if they’re in season. Sweet cherries like Bing or Rainier add a delightful sweetness, while tart cherries provide a nice balance. If fresh isn’t available, frozen pitted cherries work beautifully too—just make sure to thaw and drain them to avoid excess moisture.
How should I store leftover Cherry Pie Bars?
To keep your Cherry Pie Bars fresh, store them in an airtight container at room temperature for up to 3 days. If you live in a particularly humid environment, refrigerating them can help preserve their texture for about a week. Just be sure to let them come back to room temperature before enjoying!
Can I freeze Cherry Pie Bars?
Absolutely! To freeze your Cherry Pie Bars, allow them to cool completely after baking. Slice them into individual bars and wrap each one tightly in plastic wrap or aluminum foil. Place the wrapped bars in a freezer-safe container or resealable bag and they’ll stay good for up to 3 months. When you’re ready to enjoy them, thaw overnight in the fridge or at room temperature.
Why are my Cherry Pie Bars too gooey?
If your bars turn out too gooey, it could be due to excess moisture from the cherries or not baking long enough. Make sure to drain any extra juice from thawed frozen cherries and consider adding a bit more cornstarch to absorb excess liquid. Bake until the edges are golden brown and the center is set; it should feel slightly firm when you gently touch it.
Are there any dietary substitutions I can make in this recipe?
Certainly! For a gluten-free option, substitute all-purpose flour with a 1: 1 gluten-free flour blend. If you’re looking for a vegan version, replace butter with coconut oil or vegan butter and use flax eggs (1 tablespoon ground flaxseed mixed with 2.5 tablespoons water) instead of regular eggs. These swaps will still yield delicious Cherry Pie Bars that everyone will love!
How long do I need to bake my Cherry Pie Bars?
Typically, you’ll want to bake your Cherry Pie Bars at 350°F (175°C) for about 30-35 minutes. Look for a golden-brown crust and bubbling cherry filling as indicators that they’re perfectly baked. Remember that every oven is different; using an oven thermometer can help ensure accuracy!
Cherry Pie Bars
Ingredients
Method
- Preheat the oven to 350°F (175°C).
- Grease a 9x13-inch baking dish with butter or non-stick spray.
- In a large bowl, combine flour, sugar, and cold butter until crumbly.
- Firmly press two-thirds of the crumb mixture into the bottom of the prepared baking dish.
- Spread cherry filling over the crust evenly.
- Crumble the remaining one-third of the crust mixture over the cherry filling.
- Bake for 30-35 minutes, or until golden brown on top.
- Let the bars cool in the pan on a wire rack for at least an hour before slicing.