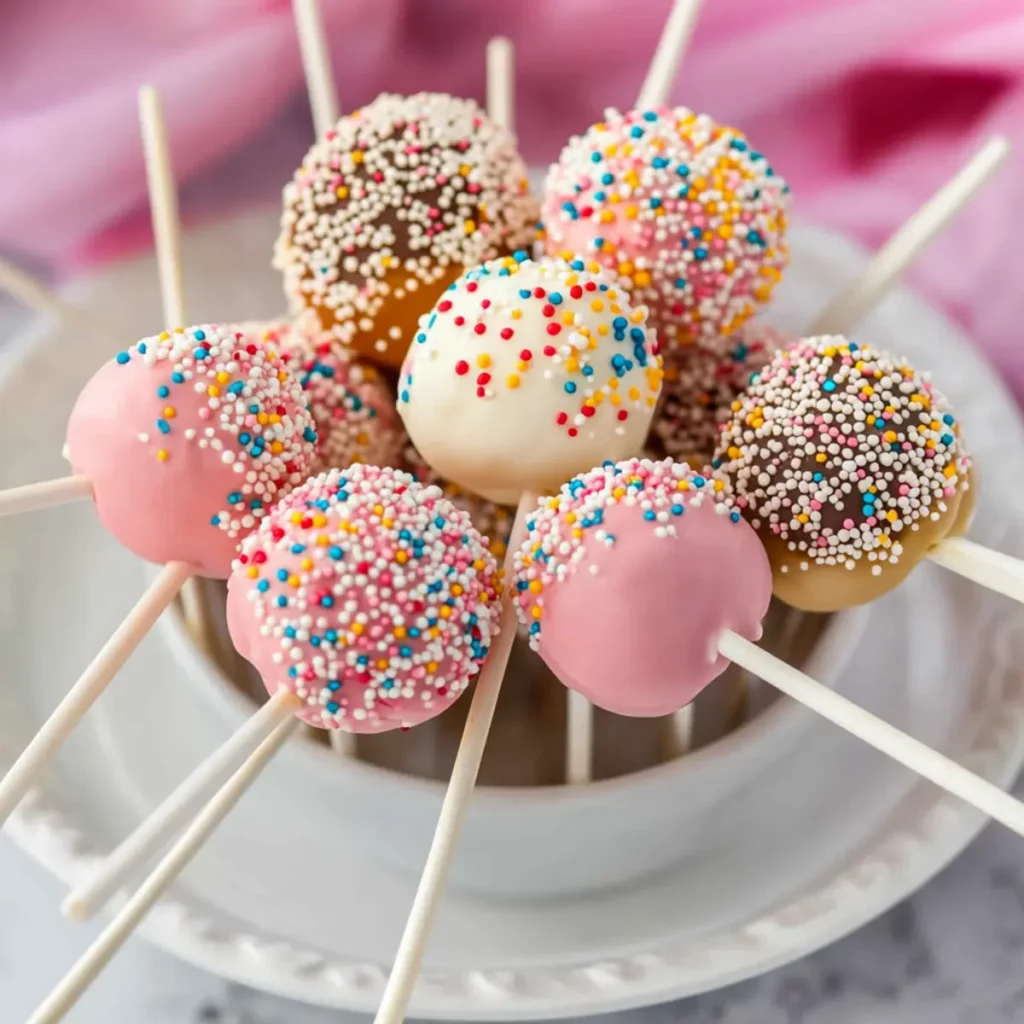
There’s something magical about cake pops that beckons you to indulge. Picture this: a sweet, bite-sized treat, coated in colorful candy melts and adorned with sprinkles that could make even the dullest day sparkle. Cake pops are not just desserts; they’re miniature masterpieces, and trust me, they taste just as delightful as they look. Whether you’re celebrating a birthday, gearing up for a holiday bash, or just looking to brighten a regular Tuesday, these little wonders will undoubtedly steal the show.
As I reminisce about my first adventure into the world of cake pops, I can’t help but chuckle. I had swiped the idea from a friend’s birthday party, and what ensued was a colorful explosion of cake batter, frosting, and a sprinkle of chaos. The memory still brings a smile to my face whenever I pop one in my mouth. Now, it’s your turn to create delightful moments with this easy cake pops recipe, perfect for any occasion!
Why You'll Love This Cake Pops
- This incredible Cake Pops transforms simple everyday ingredients into restaurant-quality flavors that will blow your mind completely.
- Foolproof recipe techniques guarantee perfect results every single time, making even novice cooks feel like professional chefs instantly.
- Stunning visual appeal with gorgeous colors and mouthwatering aromas creates the ultimate Instagram-worthy dish for any special occasion.
- Endlessly adaptable for different dietary needs while working beautifully for meal prep, date nights, or entertaining large groups effortlessly.
Ingredients for Cake Pops
Here’s what you’ll need to make this delicious Cake Pops:
15.25 oz box cake mix – Choose your favorite flavor for a personalized touch, or stick with classic vanilla for versatility.
Ingredients listed on the back of the cake mix box – You need these common baking supplies, usually water, oil, and eggs, to bring your cake to life.
½ cup frosting – Any flavor will do! This magical glue will help mold your cake into those addictive bites.
12 oz candy melts – Grab colorful candy melts to create an irresistible coating for your cake pops. They can be found in various colors!
Lollipop sticks – Essential for that delightful hand-held experience, making these treats easy to enjoy.
Sprinkles – Because, honestly, everything is better with sprinkles; don’t hold back on colors or shapes for added fun!
How to Make Cake Pops
Follow these simple steps to prepare this delicious Cake Pops:
Step 1: Preheat Your Oven
Start by preheating the oven to 350ºF (175ºC). Grab a 9×13 inch pan and give it a good spray with nonstick spray. We want those cake pops to pop out effortlessly.
Step 2: Prepare the Cake Batter
In a large mixing bowl, combine the cake mix, water, oil, and eggs as per the instructions on the back of the box. Whisk until smooth and thoroughly blended before pouring the beautiful batter into your prepared pan. Bake as guided on the box, usually around 25 minutes.
Step 3: The Cake Transformation
When the cake emerges from the oven, it’s showtime! Carefully transfer the warm cake to a large mixing bowl. Then, add your ½ cup of frosting. Channel your inner musician and beat the mixture on low speed with an electric mixer until you achieve that dough-like texture that feels like pure magic.
Step 4: Shape the Cake Balls
Now, the fun part! Use a tablespoon-sized scoop to portion out and roll the cake mixture into balls. Place these delightful spheres on a lined baking sheet and pop them into the fridge to chill for about 2 hours. This helps them firm up so they hold their shape during coating.
Step 5: Get Melty with Candy Coating
Melt the candy melts in a 2-cup liquid measuring cup. Microwave them in 20-second intervals, stirring after each interval until they’re perfectly smooth. This can be quite therapeutic, just don’t overdo it—nobody likes a burnt candy melt!
Step 6: Coat and Decorate
Here comes the grand finale! Working in batches of 2 or 3, dip a lollipop stick into the melted candy around ½ inch deep, then insert it into the center of each chilled cake ball. Flourish the cake ball in the coating until it’s entirely covered. Tap the stick against the edge of the cup to remove excess coating, and sprinkle with colorful sprinkles while the coating is still wet. Finally, place them upright in styrofoam or a box to set.
Now you have a delightful tray of cake pops ready for your celebration! Serve them at parties, send them off with friends, or keep them for yourself—they’re just that tempting. No one can resist these sweet wonders, and neither will you! Enjoy the sweet satisfaction of creating something so delicious, and watch how quickly they disappear.
And there you have it, a foolproof recipe for cake pops that will undoubtedly make you a superstar in the baking world. As you indulge in these sugary bites, remember to share a few, or at least make sure to hide some for later—it’s a cake pop free-for-all after all!

This showstopping Cake Pops delivers restaurant-quality results using simple ingredients you probably already have at home. The perfect balance of textures and flavors creates an unforgettable dining experience that will have everyone asking for seconds. Picture-perfect presentation with vibrant colors makes this dish absolutely Instagram-worthy and guaranteed to impress any dinner guest. Incredibly versatile recipe that works beautifully for weeknight dinners, meal prep, special occasions, or even outdoor entertaining sessions.
Perfecting Cake Pops Cooking Process
To achieve perfect Cake Pops, bake your cake first, letting it cool entirely before crumbling. Mix the cake with frosting, roll them into balls, and chill. Melt the candy coating and dip each stick first for secure attachment before covering the entire cake ball.
Add Your Touch to Cake Pops
Customize your Cake Pops by experimenting with different flavors of cake mix and frosting. Swap vanilla or chocolate for lemon or carrot cake. Feel free to mix in crushed cookies, nuts, or surprise fillings for added delight.
Storing & Reheating Cake Pops
Store your Cake Pops in an airtight container in the refrigerator for up to a week. For longer shelf life, freeze them instead. Simply thaw in the fridge before serving, and they’ll taste as fresh as ever!
Chef's Helpful Tips for Cake Pops
- This professional-quality Cake Pops rely on precise timing and temperature control to achieve restaurant-standard results consistently.
- Master the art of mise en place by prepping all ingredients beforehand, ensuring smooth execution and preventing any last-minute cooking disasters.
- The secret lies in layering flavors throughout the cooking process rather than seasoning only at the end for maximum depth.
- Pro tip: let the finished dish rest for optimal texture and flavor development before serving to hungry guests waiting eagerly.
The first time I made Cake Pops for my niece’s birthday, it became a hilarious adventure when my puppy decided he wanted to be part of the party. The mess was colossal, but we ended up with the best memories, and of course, the Cake Pops were a hit!

FAQs About Cake Pops
What are Cake Pops?
Cake Pops are delightful bite-sized treats made from crumbled cake mixed with frosting, rolled into balls, and coated with a flavorful candy melt. They typically come with a lollipop stick for easy enjoyment. These treats are not only fun to eat but can also be beautifully decorated with sprinkles or other toppings, making them perfect for parties, celebrations, or just an indulgent snack!
How do I make my Cake Pops stick better?
To ensure your Cake Pops stick well to their lollipop sticks, you can dip the end of each stick into the melted candy coating before inserting it into the cake ball. This creates a stronger bond when the melted coating hardens. Additionally, make sure your cake balls are well-chilled before dipping to maintain their shape during the coating process.
Can I use different flavors for Cake Pops?
Absolutely! One of the best things about Cake Pops is their versatility. You can switch up the flavor of your cake mix and frosting to create unique combinations. Try red velvet with cream cheese frosting, or lemon cake with a raspberry filling! Mixing in additional ingredients like crushed cookies or nuts can also add an exciting twist to your pops.
How should I store my Cake Pops?
To keep your Cake Pops fresh, store them in an airtight container in the refrigerator for up to a week. If you want them to last longer, you can freeze them! Just make sure to wrap them securely. When you’re ready to enjoy, let them thaw in the fridge to retain moisture and flavor.
Conclusion for Cake Pops
Cake Pops are a delightful and customizable treat that bring joy to any occasion. By following the simple steps outlined in our recipe, you can create perfect Cake Pops that look stunning and taste incredible. With endless flavor combinations and easy storage, these sweet bites are sure to become a favorite in your home. Embrace the fun of baking and share the joy of Cake Pops with friends and family!

Delicious Cake Pops Recipe: Easy Step-by-Step Guide for Home Bakers
Ingredients
Equipment
Method
- Preheat the oven to 350ºF. Spray a 9×13 inch pan with nonstick spray. Set aside.
- In a large bowl, whisk together cake mix, water, oil, and eggs until combined as instructed on the back of the box. Pour the prepared batter into the pan and bake according to the recommended time on the box.
- Immediately when the cake comes out of the oven, carefully transfer the cake to a large mixing bowl. Add ½ cup frosting and beat with an electric mixer on low speed until the cake and frosting form a dough-like texture.
- Use a tablespoon-sized scoop to form and roll the dough into balls. Place the cake balls on a lined baking sheet and refrigerate for 2 hours.
- Re-roll the balls as needed after they’ve chilled. Melt the candy melts in a 2-cup liquid measuring cup in the microwave at 20-second intervals, stirring after each interval until smooth.
- Working in batches of 2 or 3, dip the lollipop stick about ½ inch into the candy melts, then insert it into the center of the cake ball. Dip the cake ball into the coating until fully covered. Tap the stick against the edge of the measuring cup to let excess coating drip off.
- Add sprinkles if desired and place the cake pops upright in styrofoam or a box to set.
- Repeat the process with the remaining cake balls.